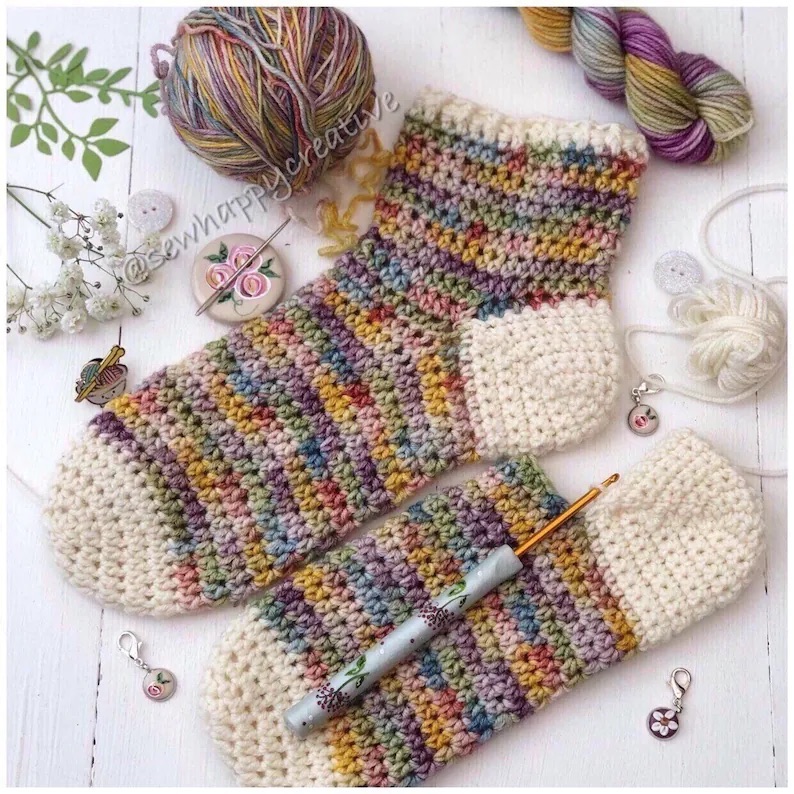
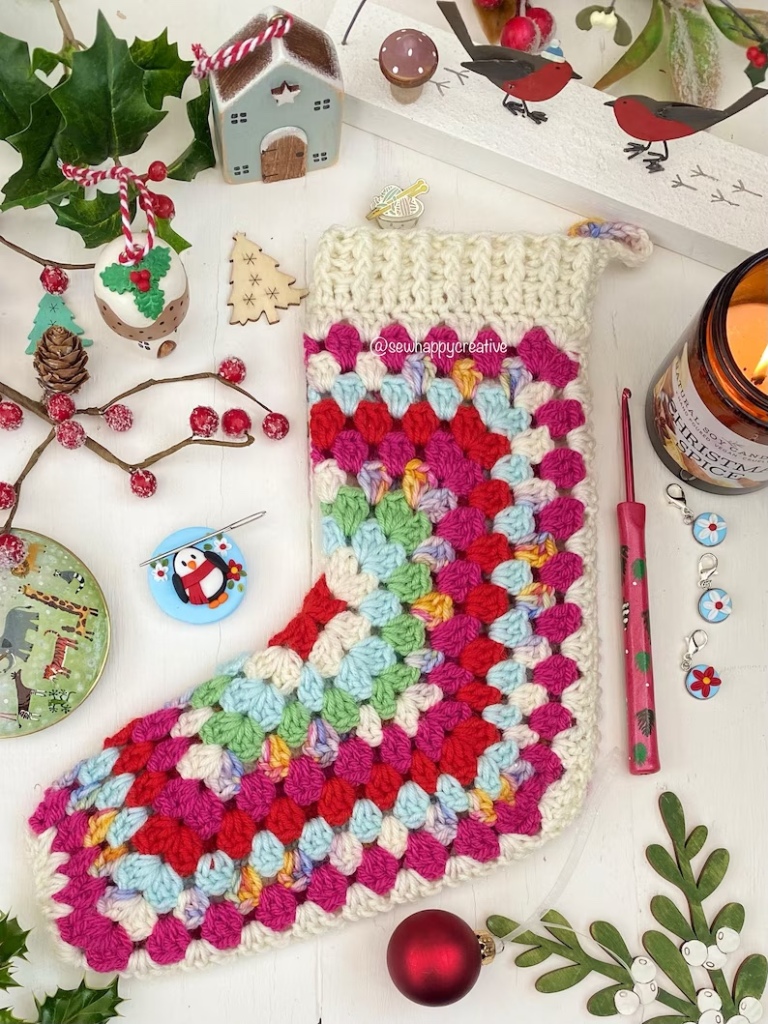
Duvet Day sock pattern is an Etsy Best Seller and can only be purchased from our Etsy shop, no one else is authorised to sell this pattern as with all our patterns they are protected by our copyright This little video is so help you make your socks and the full pattern is available as. Digital download in our Etsy shop https://sewhappycreative.etsy.com/listing/764959180
If you need a little extra help making your socks, here’s a video to guide you through the heel process to use with my pattern. Please feel free to message me on Etsy if you need any more help ..
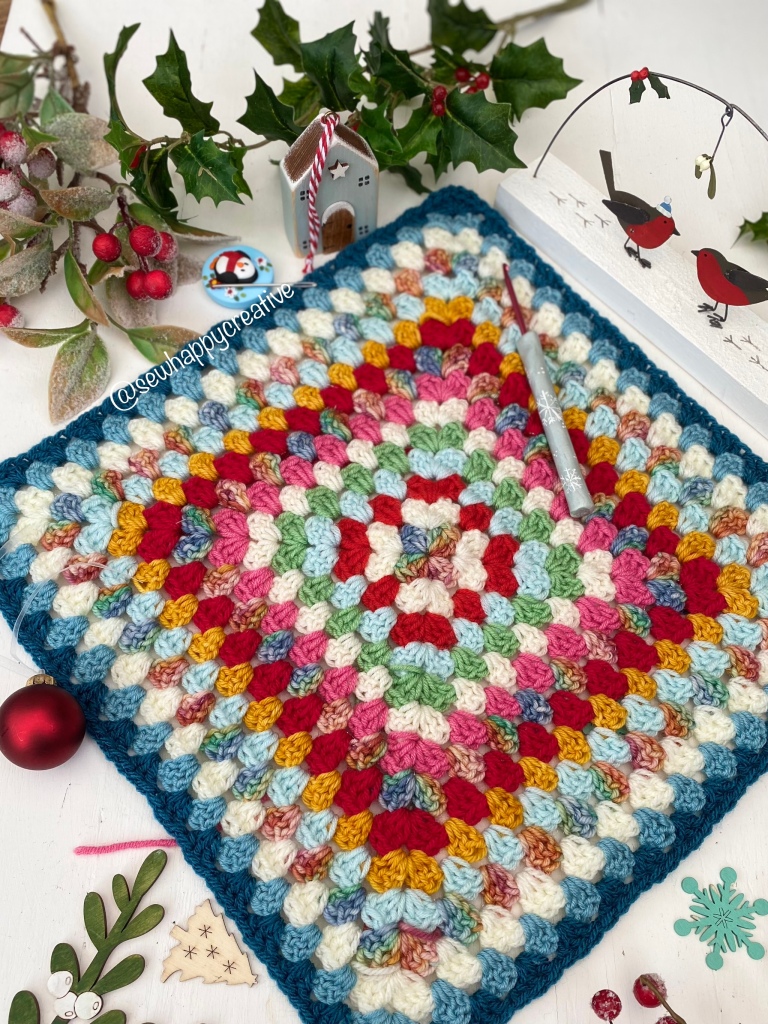
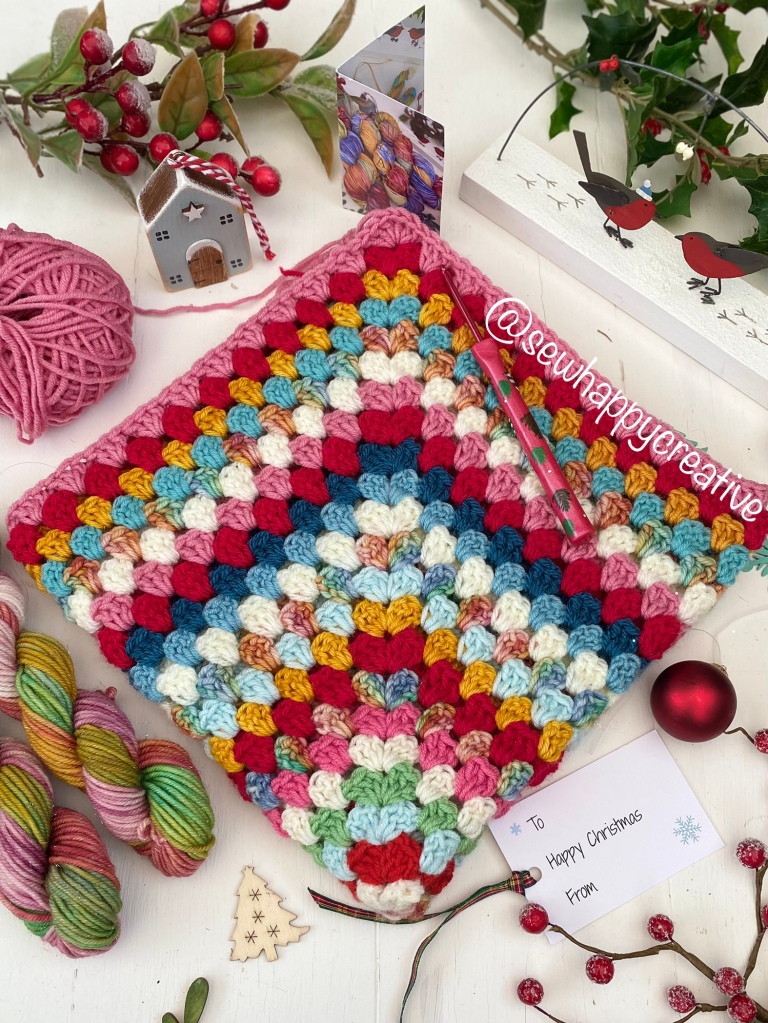
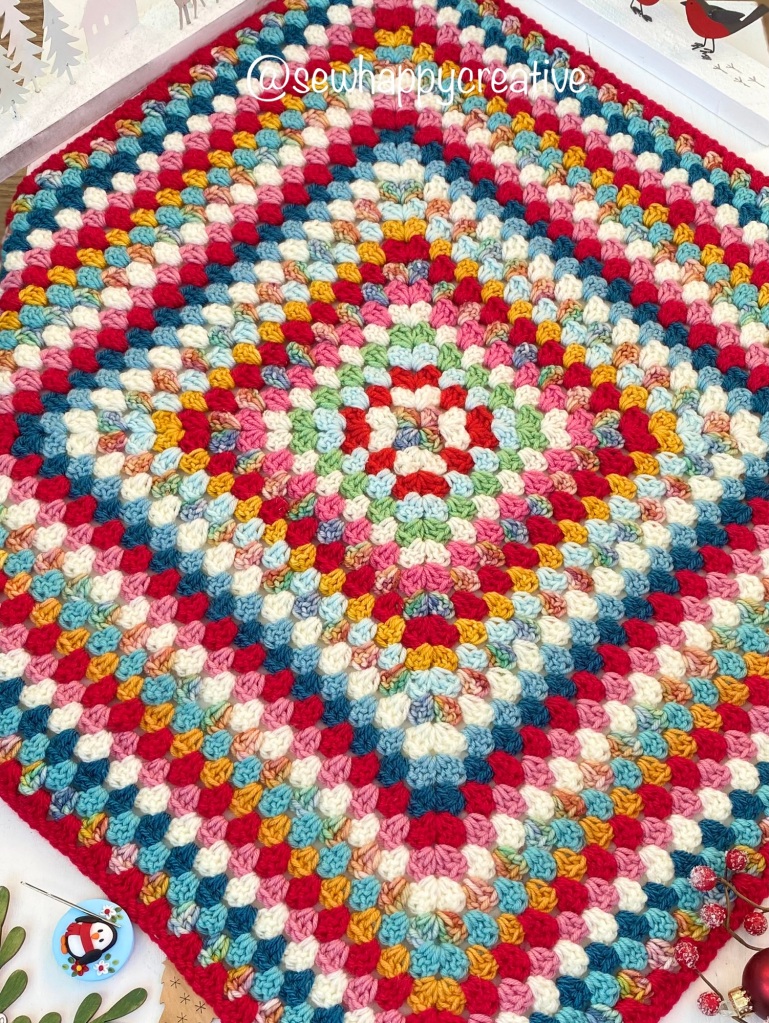
Jolly Christmas blanket is made from double knitting from my yarn stash, NB I can’t give precise quantities, at the time of writing, the pattern is not finished yet.
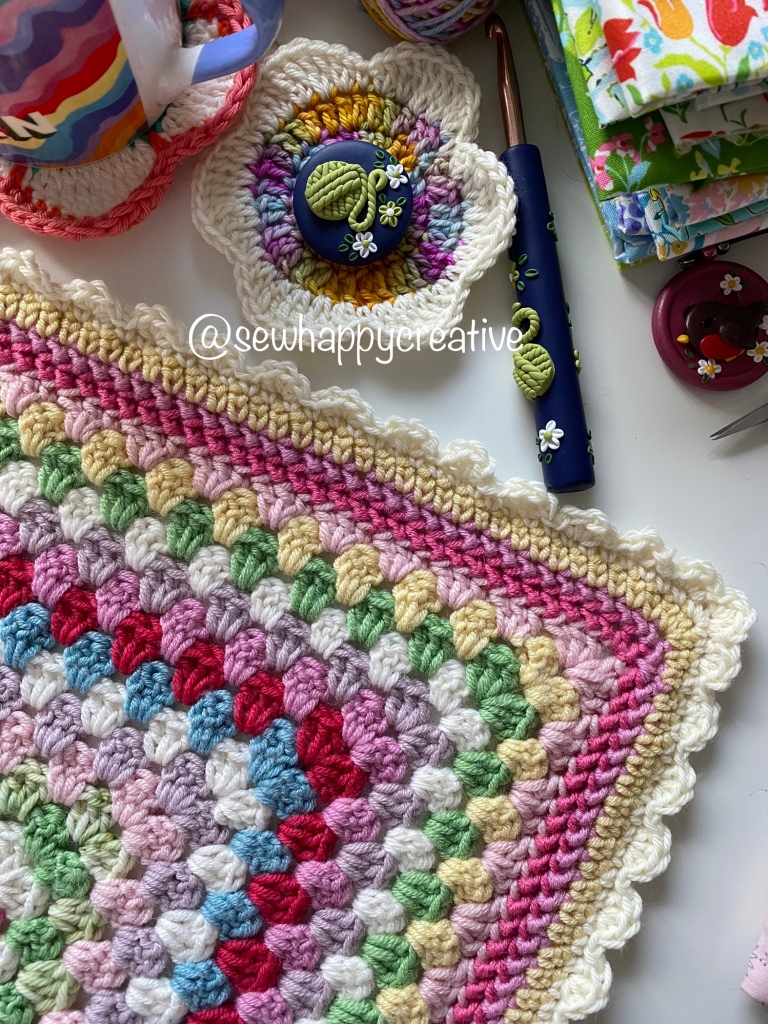
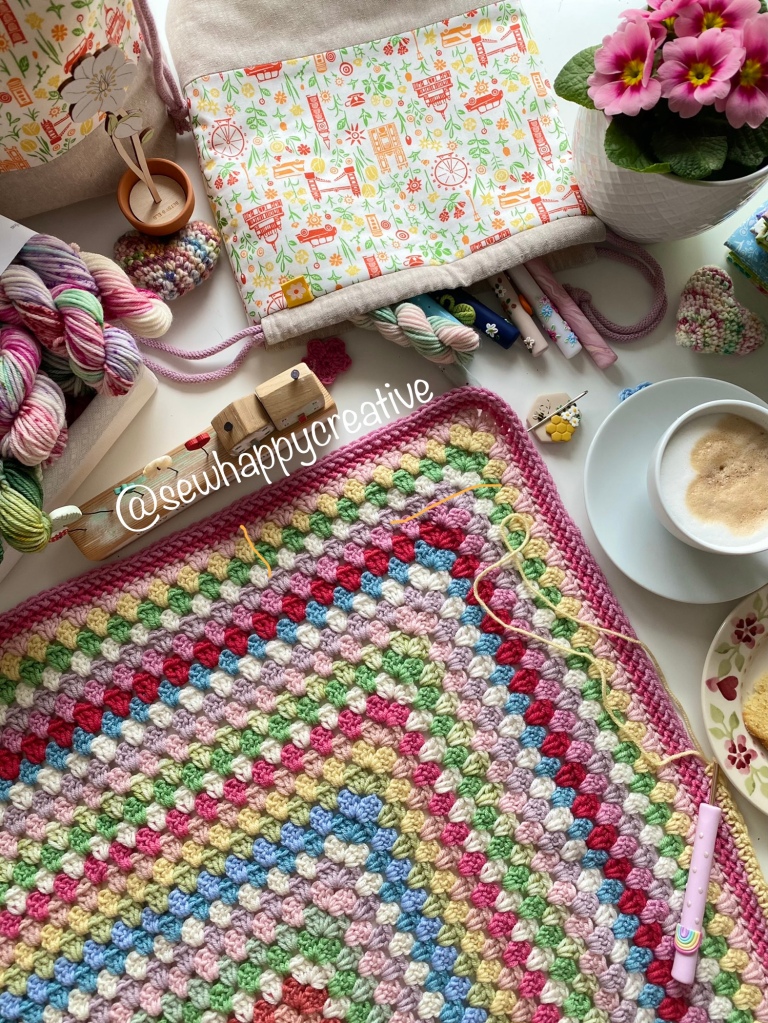
Jolly Christmas blanket pattern notes: DK yarn throughout.The main part of the blanket is large granny square with as many rounds of traditional granny square stripes as you like. . To keep your square from twisting and corners neat, I flipped over my blanket after each round alternating from RS and WS rounds, I used a 4mm hook and the colour sequence guide below, to make one large granny square. My blanket is made entirely from stash and I will include the colours below with as far as I have got so far. My hand dyed yarn is listed below as I used. dK sparkle to make my blanket twinkle . So far I have used 30 grams of sparkle and worked 4 rounds . My border is yet to be decided so don’t forget to check back for an update .
Here are the shades that I have used . Please feel free to substitute with your own eg use Stylecraft lipstick throughout for the red unless you like me have 2 shades of red, you could use Stylecraft duck egg in place of my Sirdar snuggly pixie dust, remember it’s a stash buster project, designer do give you a really festive blanket and empty some of your yarn stash.
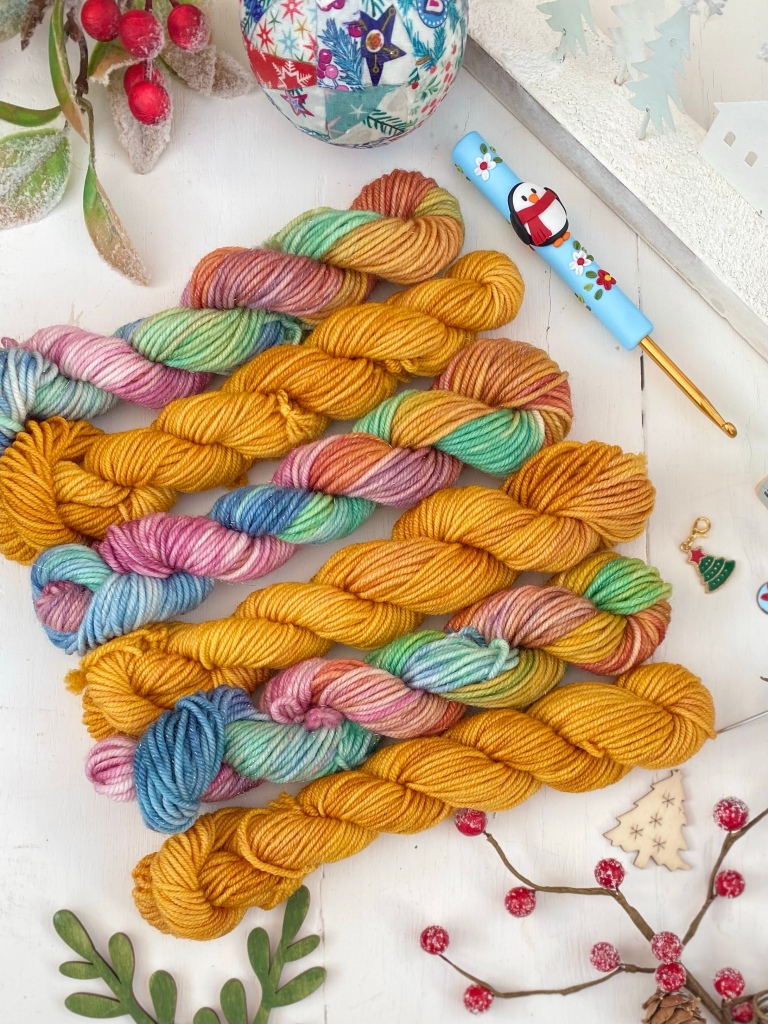
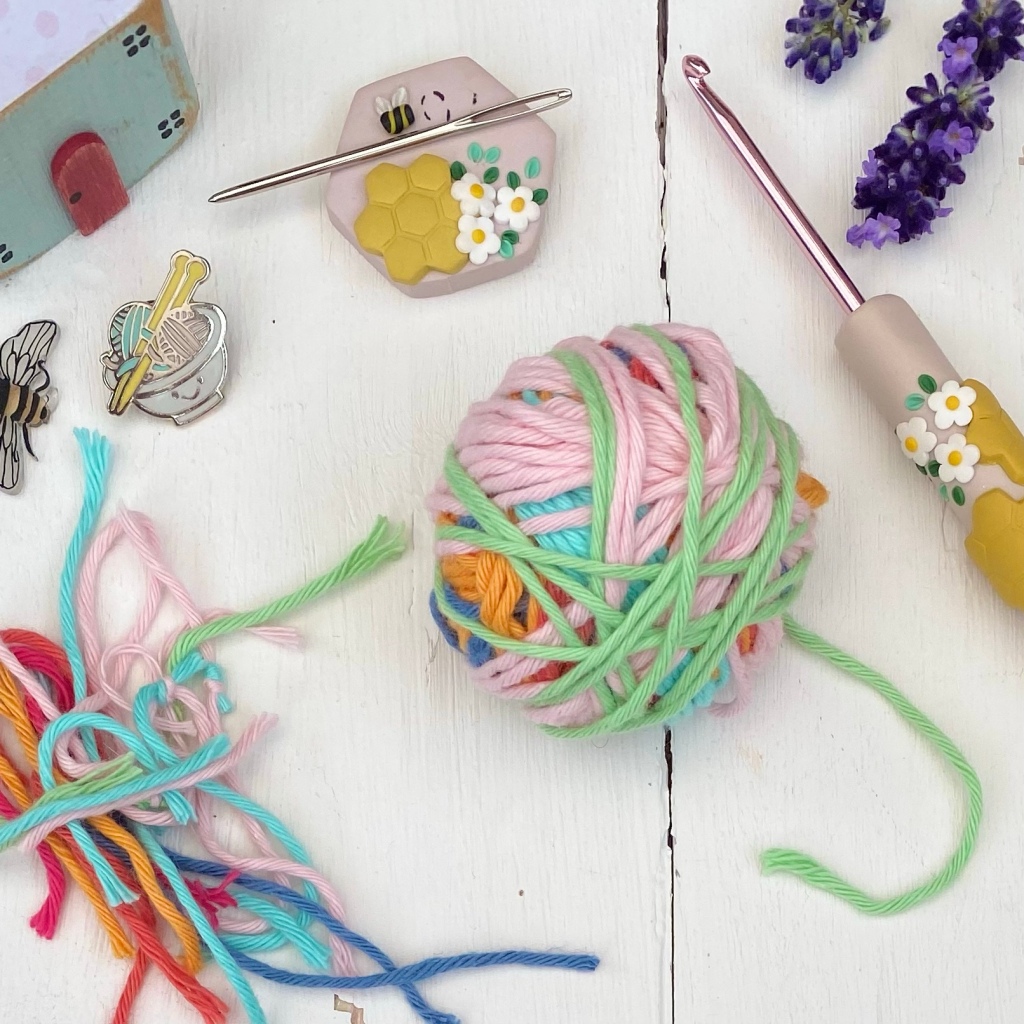
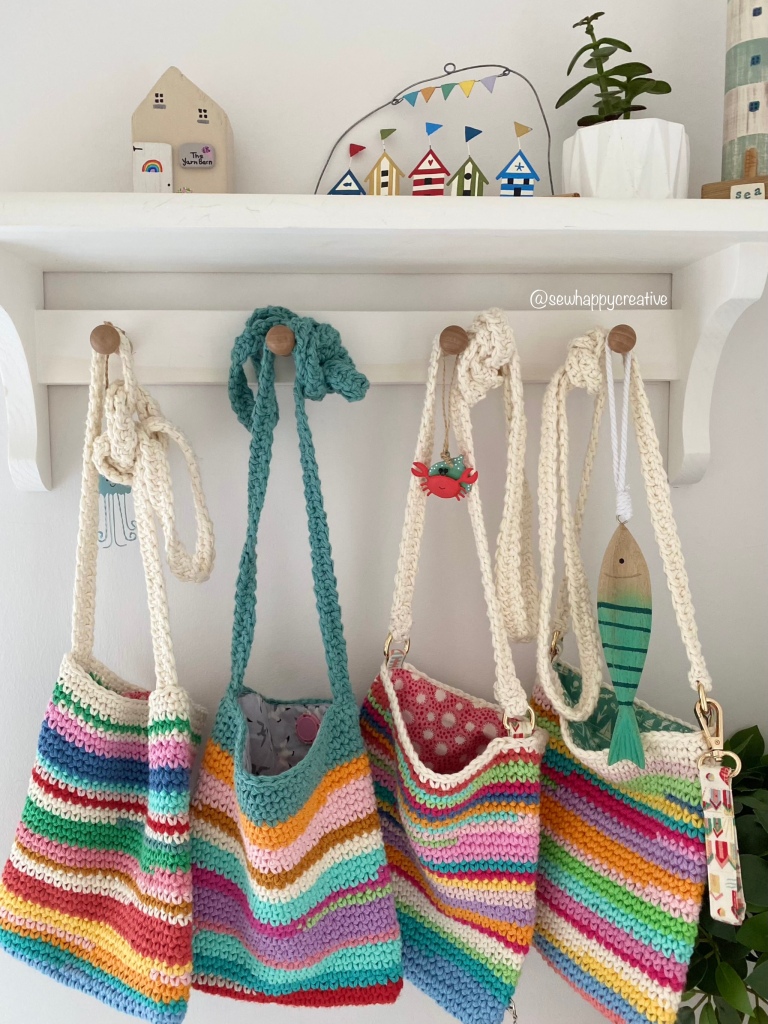
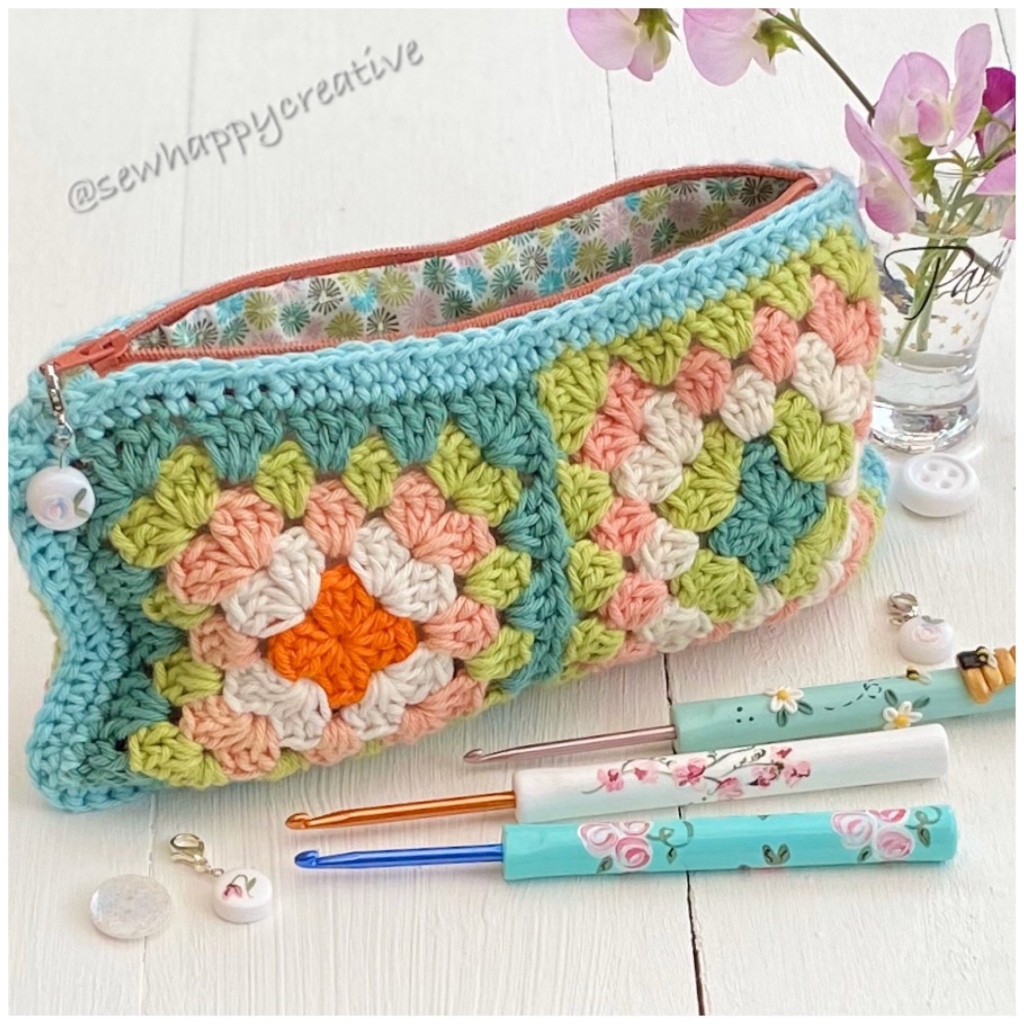
This video is to help your make your own magic join for a gorgeous unique ball of yarn . It’s a really handy method to join yarn especially handy when you are using small amounts from your stash and it’s used in my latest bag pattern .https://www.etsy.com/shop/SewHappyCreative
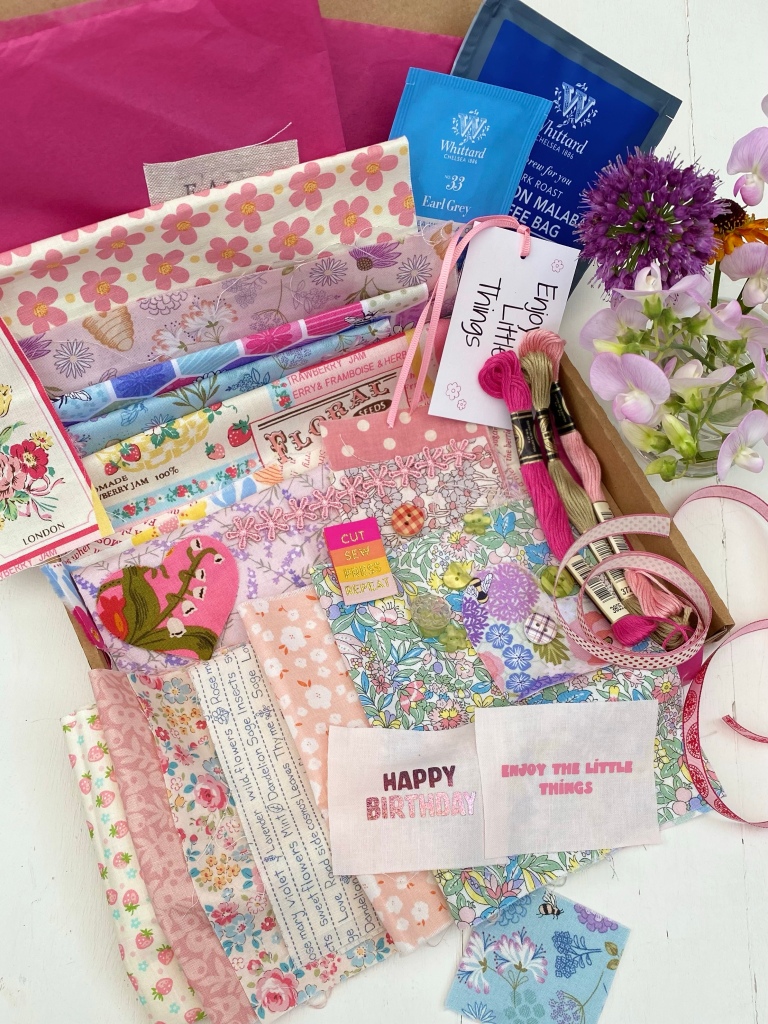
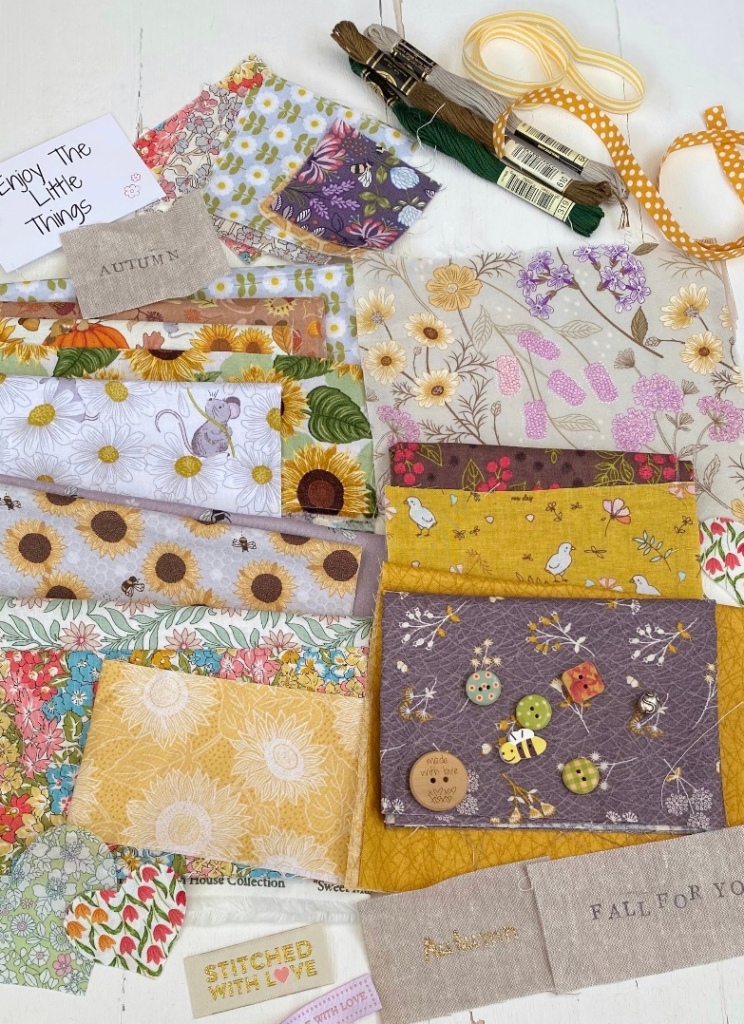
Have you seen my lovely new fabric scrap boxes? They are new in my Etsy shop and contain a generous amount of fabric for you to get SewHappy with. I have themed my boxes so they colours will all blend together with whatever you decide to make . There’s also some lovely DMC threads, buttons, ribbon, square and heart shaped pre cut fabric, woven label and heat transfer labels I have made for you . They are the perfect box to relax with and enjoy a cuppa and I have also include a tea or coffee for you .
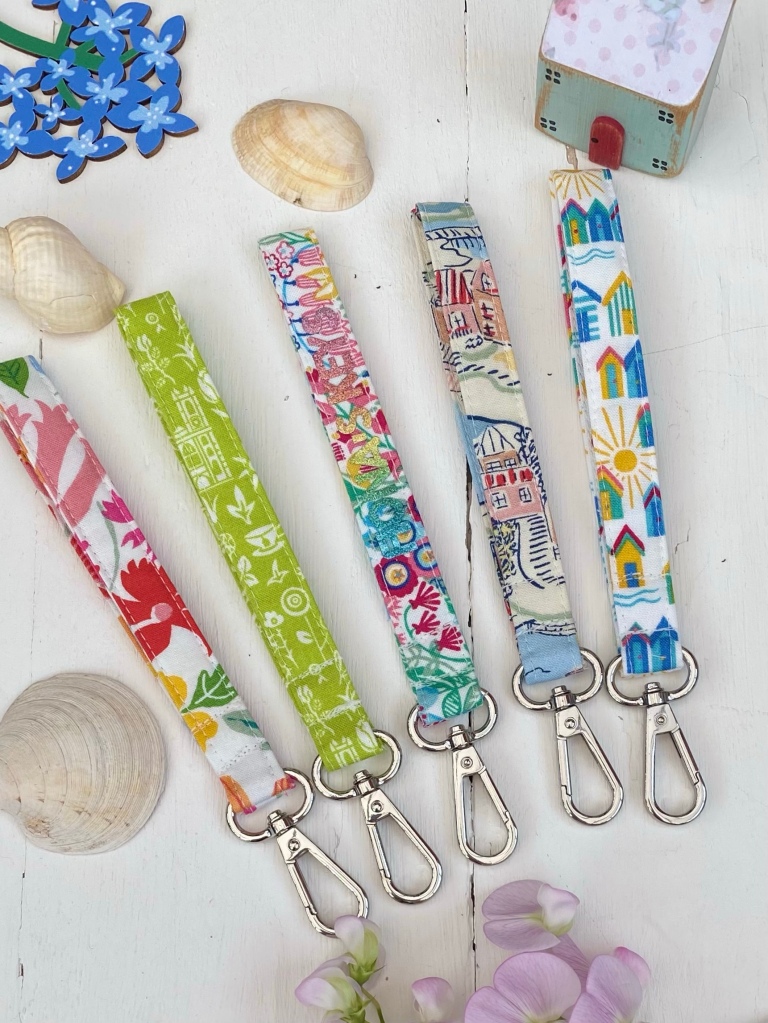
I made my key rings with a strip of fabric 30cm by 6cm. I used fusible interfacing to stiffen them. With WS together I folded them and pressed them in half lengthwise. I then pressed each long edge towards the crease on both sides . Folded in half with the raw edges tucked inside, top stitched on both sides . Popped in my lobster clasp and seamed WS together . Then turned right side out trimming my seam closely and placing the seam along the lobster clasp. I stitched closed to my lobster clasp as possible and 1.5cm from that stitching to secure . See my photos . Happy crocheting and crafting 🧶 🧵
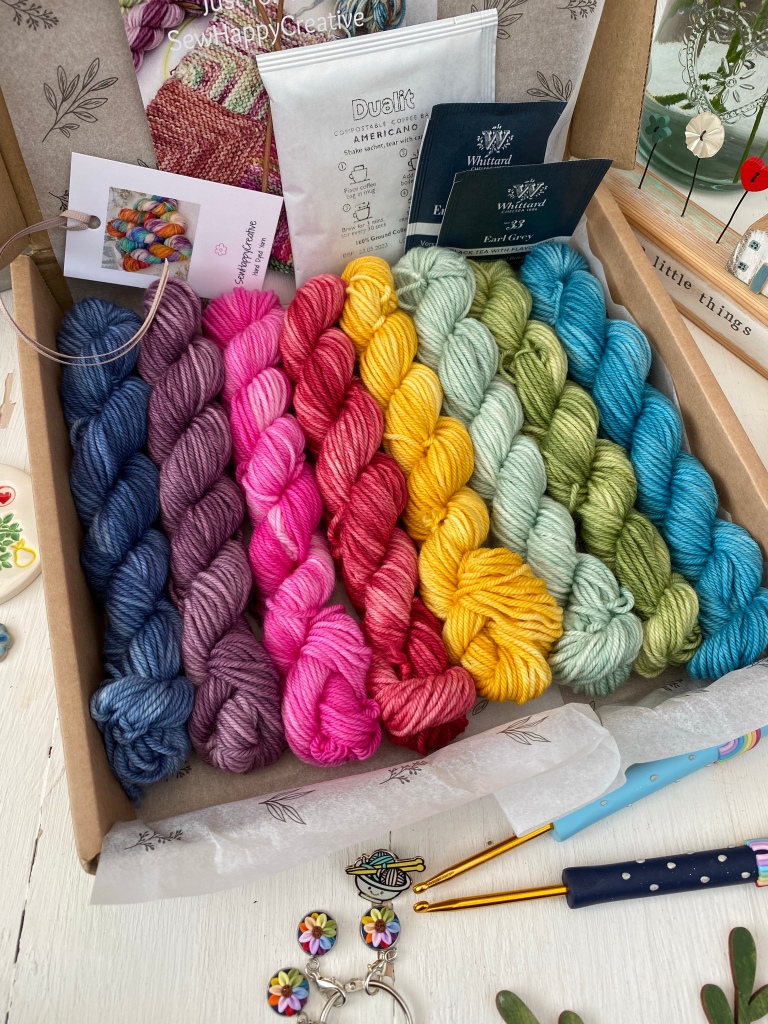
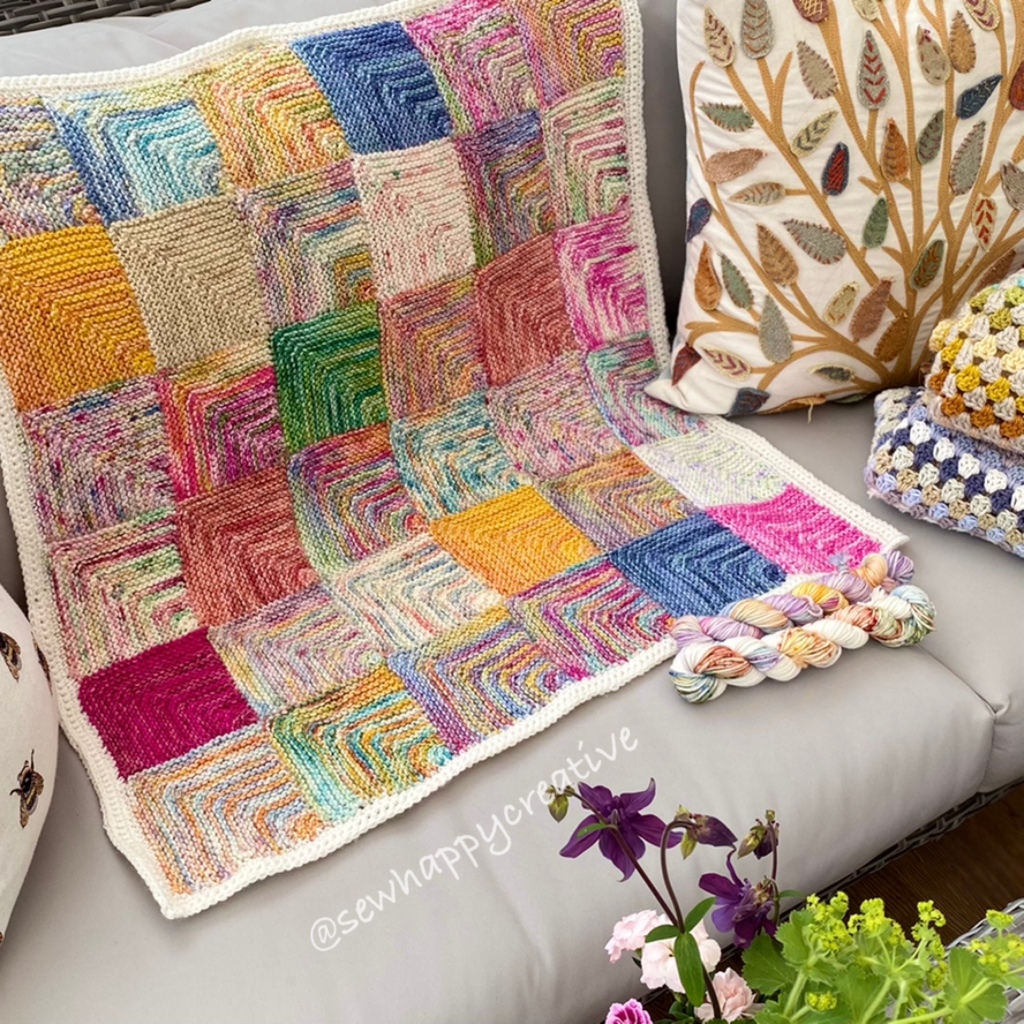
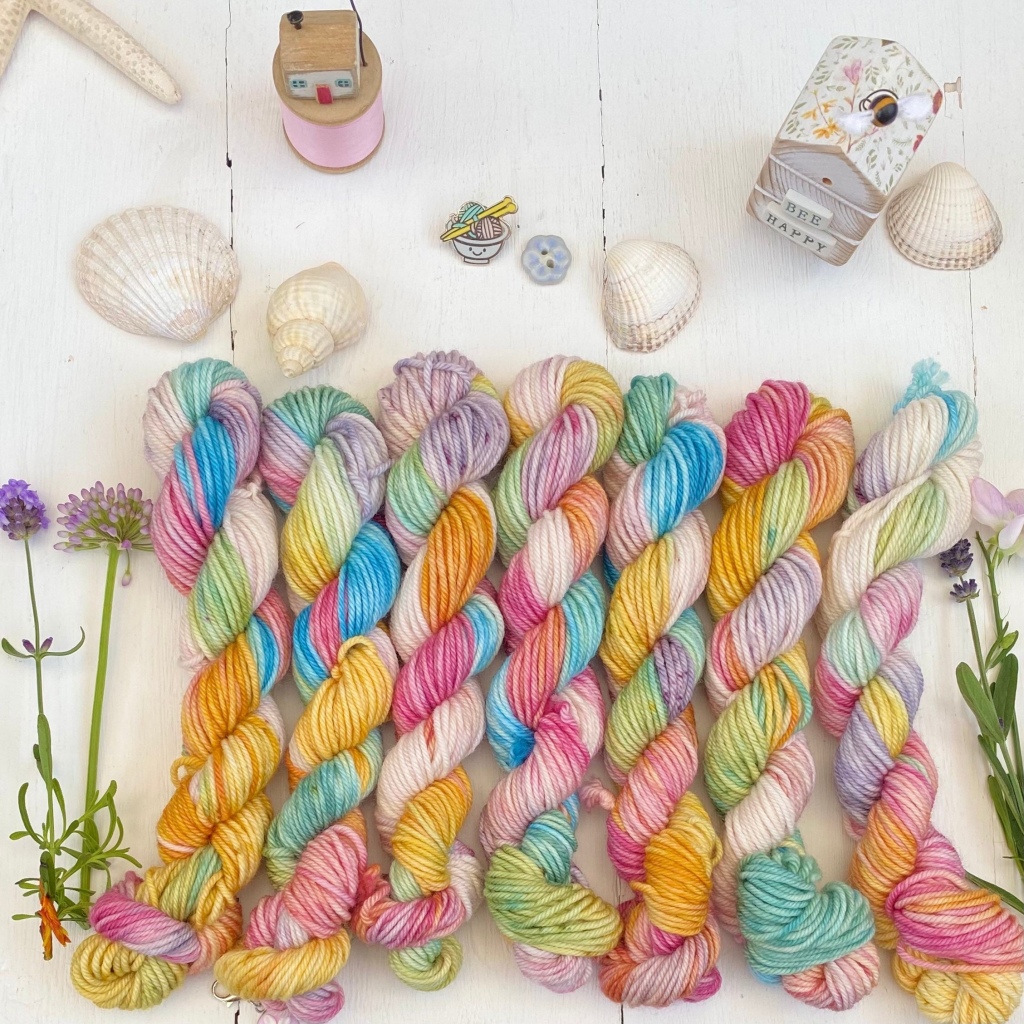
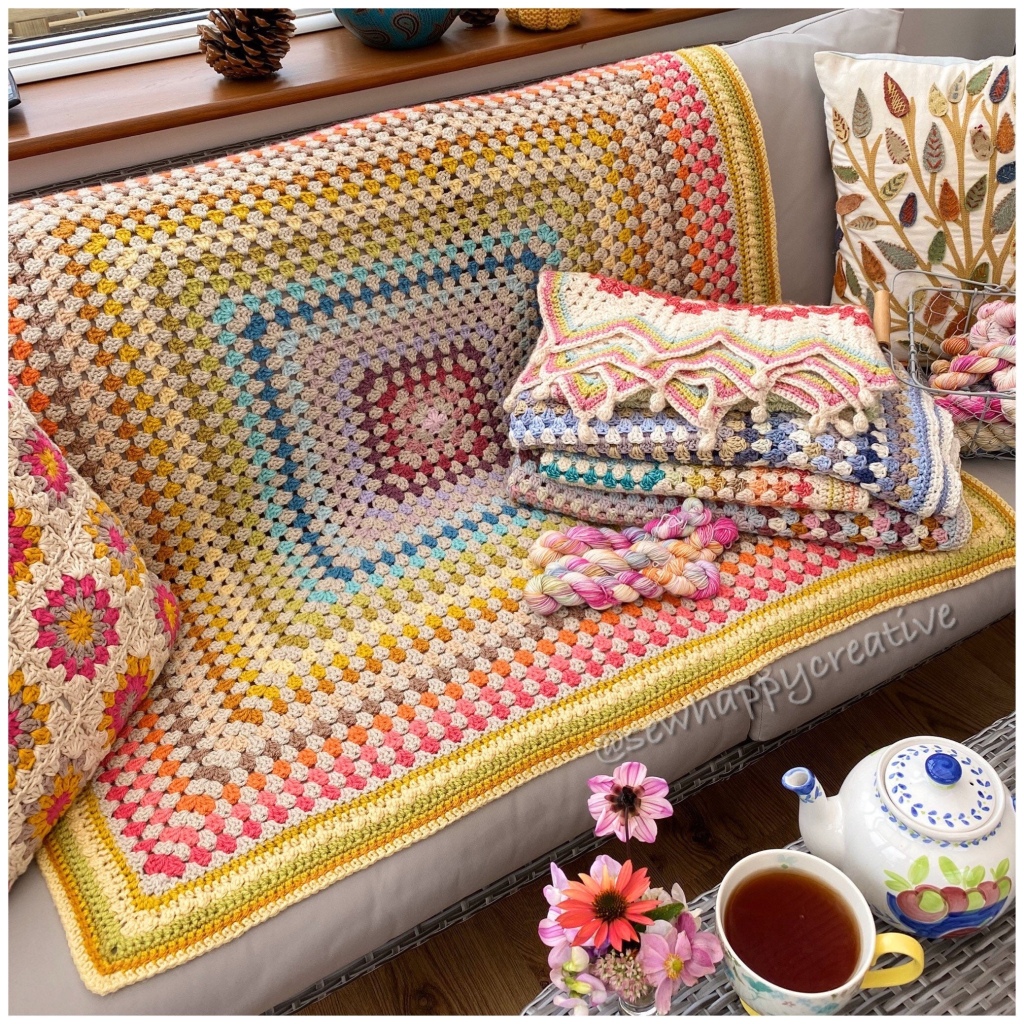
I made this gorgeous blanket for my baby granddaughter Maisy to keep- her cosy in her new pushchair. It was made entirely from my yarn stash some of the colours I’ve had a while. All the yarns I have used all have a high percentage of merino wool, So that you can make a blanket like mine I have listed all my shades below in several different branded yarns. However there are some shades that are discontinued and no longer available so I have listed alternate shades when this happens to get the best match possible. I have also added some of my mini skeins of hand dyed yarn .
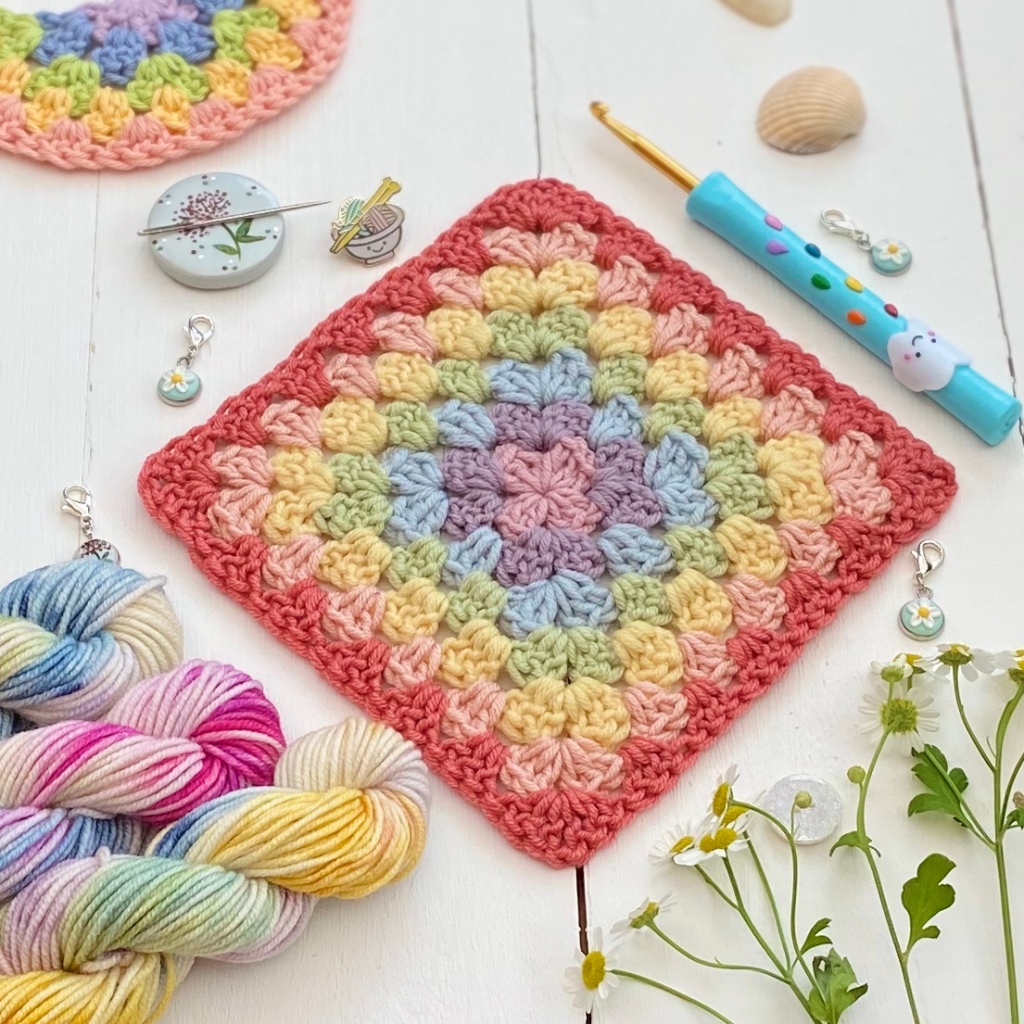
Spring Rainbow blanket pattern notes:The main part of the blanket is large granny square with 33 rounds of traditional granny square stripes. To keep your square from twisting and corners neat, I flipped over my blanket after each round alternating from RS and WS rounds, I used a 4mm hook and the colour sequence guide below, to make one large granny square. My border was 2 rounds of htr (US hdc) herringbone stitch and 1 round of extended dc (US sc) both of these stitches there a videos of on my Instagram page. I then finished it off with a round of dc (US sc) a pretty shell edging which I’ll share again on my reel and update the details here afterwards.
Rounds 1- 33 Following the colour sequence below, work rounds 1-33 working as a traditional granny square with 3tr, in each sp and (3tr, ch1, 3tr,) in each corner sp, ss to join each round to beg ch-3.
I have used a mixture of yarn for my blanket, as it was all made from merino yarn in my stash it may not be possible to give the precise match as not all yarn is available any more and you may like to use up colours you already have or duplicate shades that I have given below. I hope you love making my blanket and if you want to add handy dyed yarn like me there there’s a variety of mini skeins in my Etsy shop many in lucky dip bags so you can use a variety of shades https://www.etsy.com/shop/SewHappyCreative
Round 1& 28 Debbie Bliss Rialto Rose 76, Round 2 & 29 Debbie Bliss Rialto lilac 85 Round 3,15 Debbie Bliss Rialto Sea 83, Round 4 Debbie Bliss Baby Cashmerino Citrus 18 Round 5 ,17 & 32 Debbie Bliss Rialto Banana 57, Round 6 Debbie Bliss Baby Cashmerino Light pink 600, Round 7 Debbie Bliss Baby Cashmerino Flame 306, Round 8, 13, 20, 25 & 30 Debbie Bliss Baby Cashmerino Ecru 101, Round 9, 21, 31 Sirdar Snuggly cashmere merino silk Green Beanstalk Round 10 Debbie Bliss Baby Rialto Mint 18 Round,11, 18, 23, 33, Sirdar Snuggly pink little piglet 300. Round 12, 24, Debbie Bliss Baby Cashmerino Lilac 10 Round 14, 26 Sirdar Snuggly Cashmere Merino SilkPied Piper 305 Round 16& 22 I used my hand dyed yarn so the closest match is DB baby Cashmerino mint 18 as in round 10 Round 19 Sirdar Snuggly Baby cashmere Lipstick Pink 362 Round 27 Debbie Bliss Rialto Scarlet 12
Border shades are Sirdar Snuggly Baby cashmere Lipstick Pink 362, Debbie Bliss Rialto rose 76, banana 52 and ecru 101
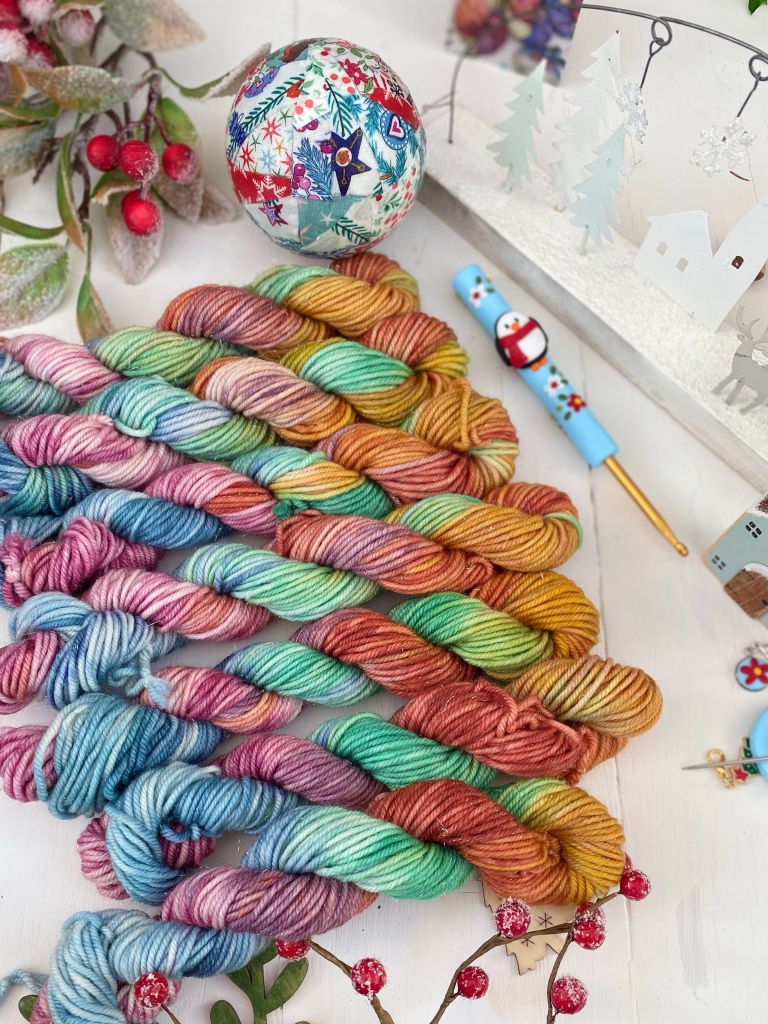
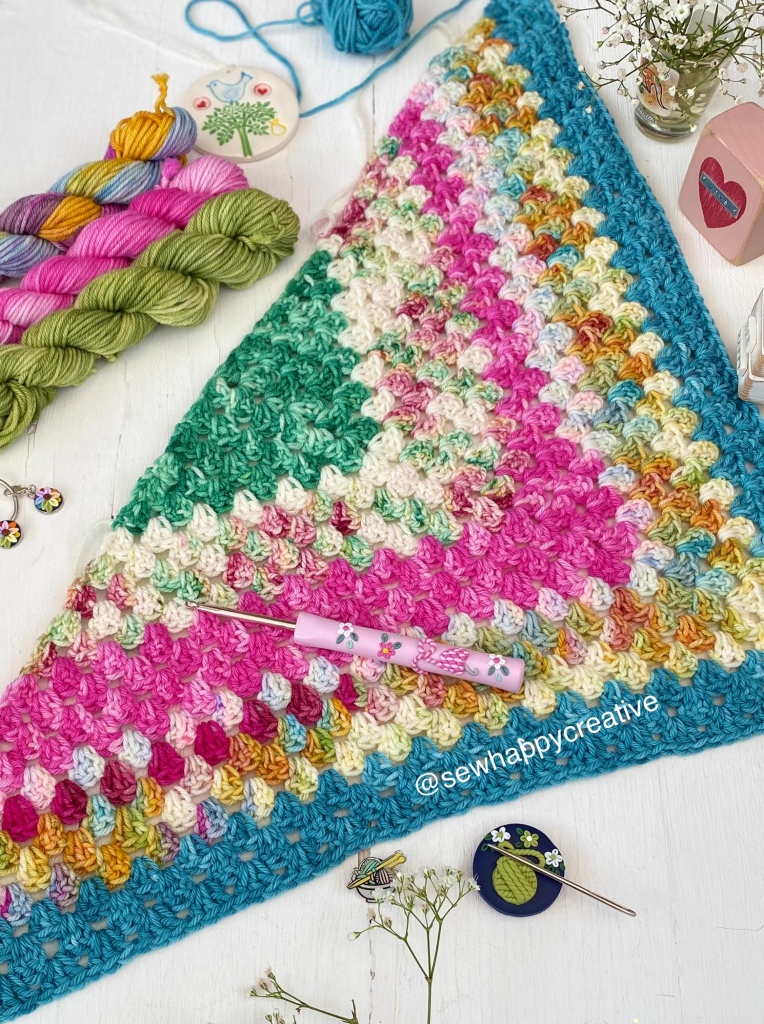
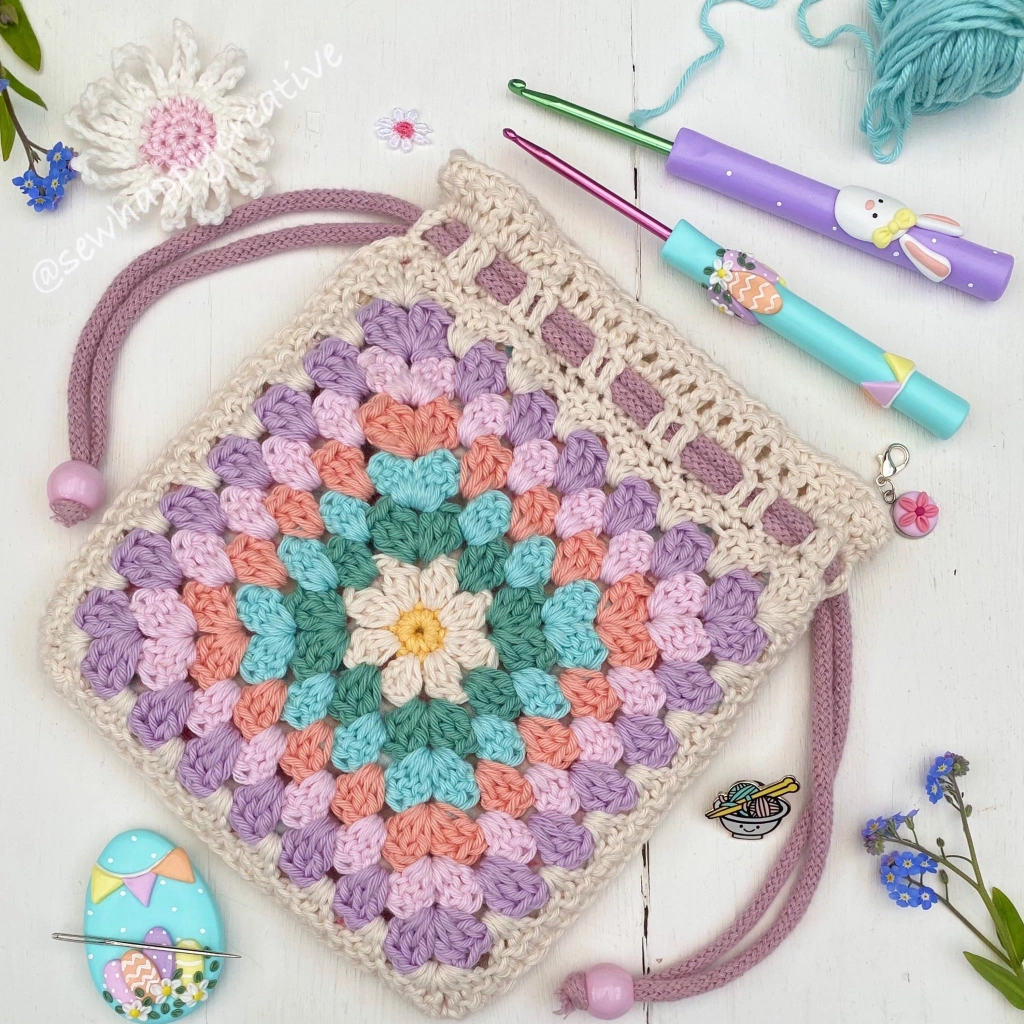
I’m using a 5 mm hook and my hand dyed mini skeins of DK yarn . Some of the yarn I made into a big multi coloured ball of yarn by joining each shade with a magic knot . It’s a fab way to join in shades with minimum yarn ends to stitch in. It’s a win win. 💗
You will need: Any yarn you have in your stash I have used dk our own hand dyed yarn 5mm hook Tapestry needle Scissors Used Stitches: UK English. ( US) ch = chain (US chain) ss= slip stitch (US slip stitch) tr = treble ( US double crochet) sp = space (US space) skst = skip (US skip stitch) beg = beginning. (US beginning)
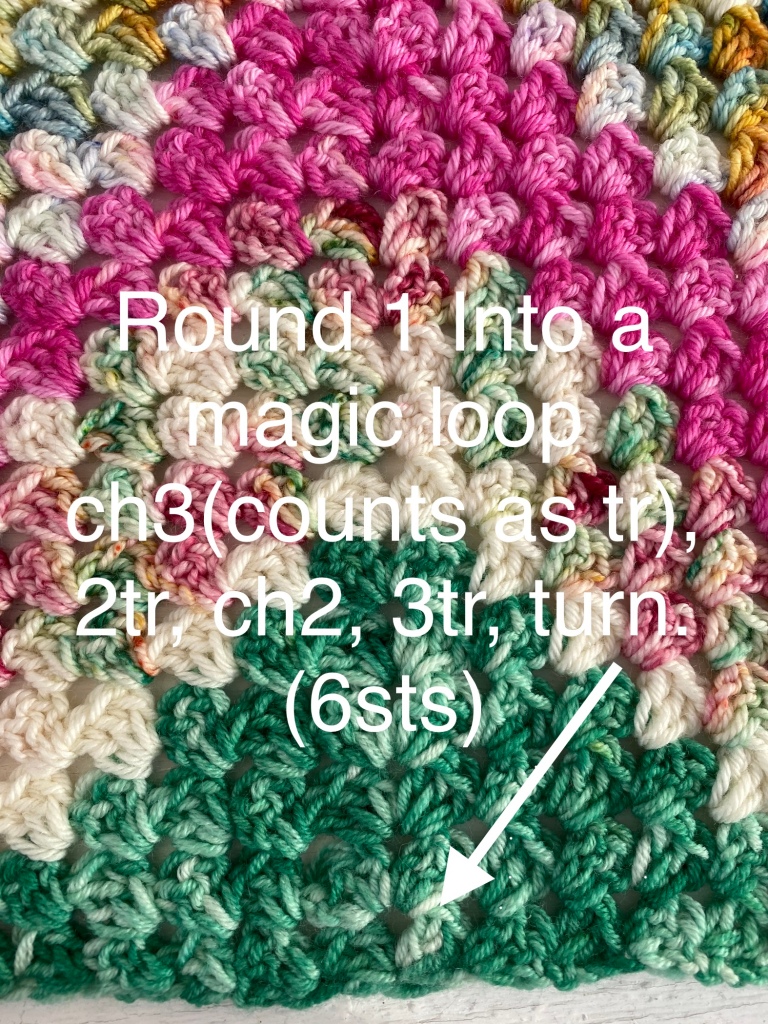
Foundation Round Using DK and. 5mm hook, Make a magic loop or chain 4, ss to join into a ring
Round 1 Into the magic loop ch3( counts as tr), 2tr, ch2, 3tr, turn.(6sts)
Round 1
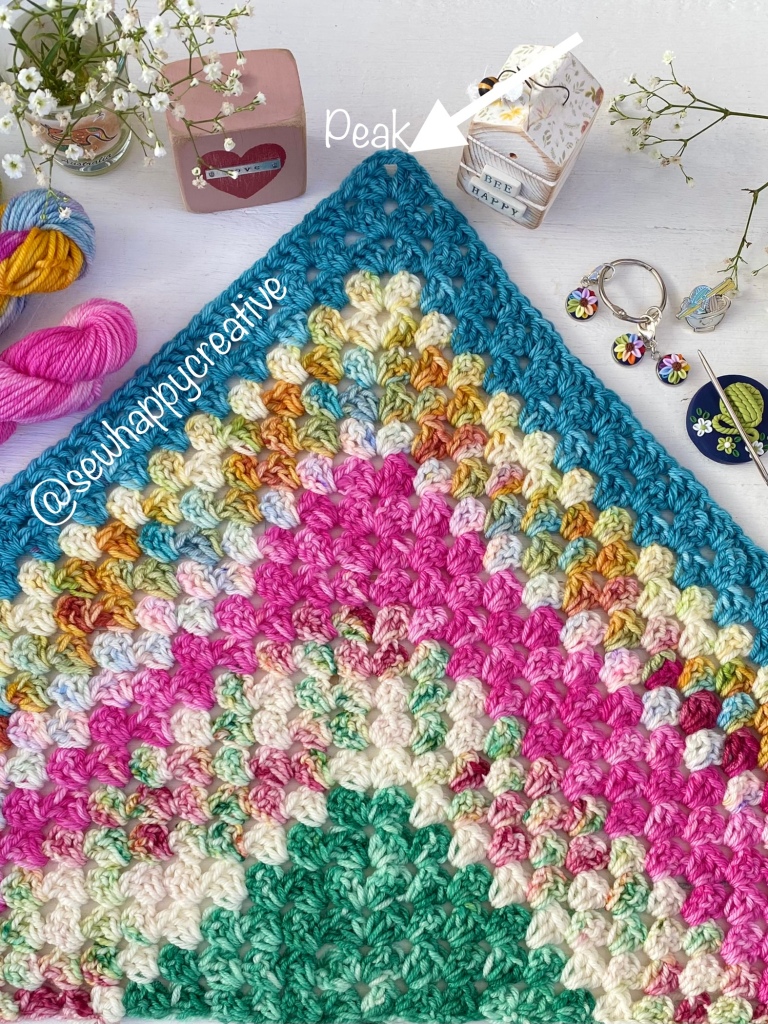
Round 2 Ch3 (counts as tr), 2tr, at base of ch-3, (3tr,ch2,3tr,), all in ch-2sp from round 1, this will be the peak of your granny shawl, 3tr, in last tr of 3tr group turn
Round 3 Ch3 (counts as tr), 2tr, at base of ch-3, *3tr, in next sp between tr groups, in the peak ch-2sp (3tr,ch2,3tr,), 3tr, in next sp between tr groups and work 3tr in last tr of 3tr group. turn.
Round 4 Ch3 (counts as tr), 2tr at base of ch-3, *3tr* in next sp, repeat from * to * until you reach the ch-2sp of the peak then (3tr,ch2,3tr,), repeat from * to * again in every sp as you would when making a granny square and work 3tr in last tr of 3tr group turn. Repeat this row as many times as you like until you get the size your require . Don’t forget to work your 3tr in last tr on every row.
Wrap your shawl around and stay cosy or add a simple border .A simple picot border would look fab,, I’ve work my picot edge as dc, (dc, ch2, dc), in alternate stitches and (dc, ch2, dc) in each corner of my shawl.
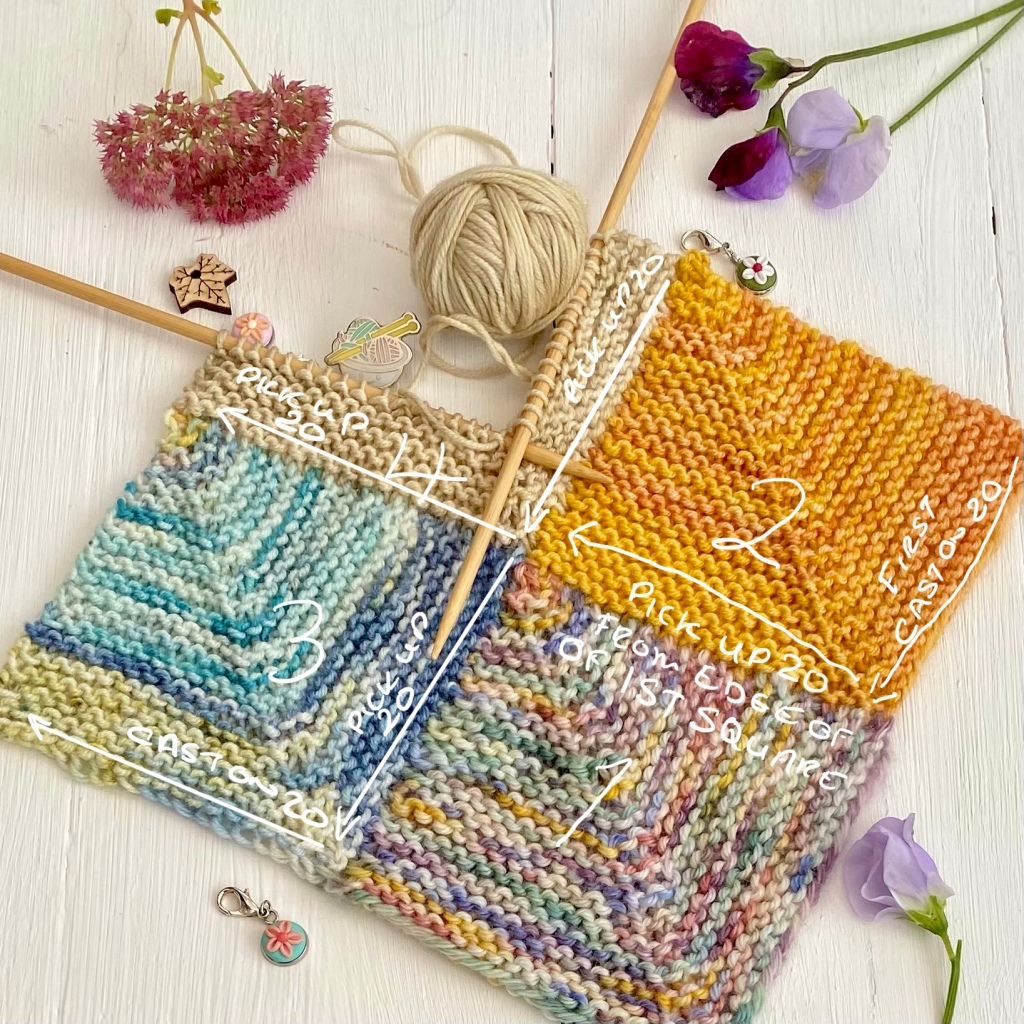
This all started last autumn after seeing an Instagram post by Made By Anita who was knitting a gorgeous mitre blanket. On researching this humble little knitted square it turns out that there are quite a few versions of a mitre square so the following is not my pattern or design it’s my interpretation and how I made my blanket for my granddaughter . I have yet to find who is the original designer to give proper credit to. I’d like to thank Made By Anita for her inspiration and also as I used a free pattern on Raverly by Georgia Nicholson called Memory blanket. I did add a little tweak of my own which I’ll add to my notes . Be warned this is totally addictive and very hard to put down. Happy Knitting.
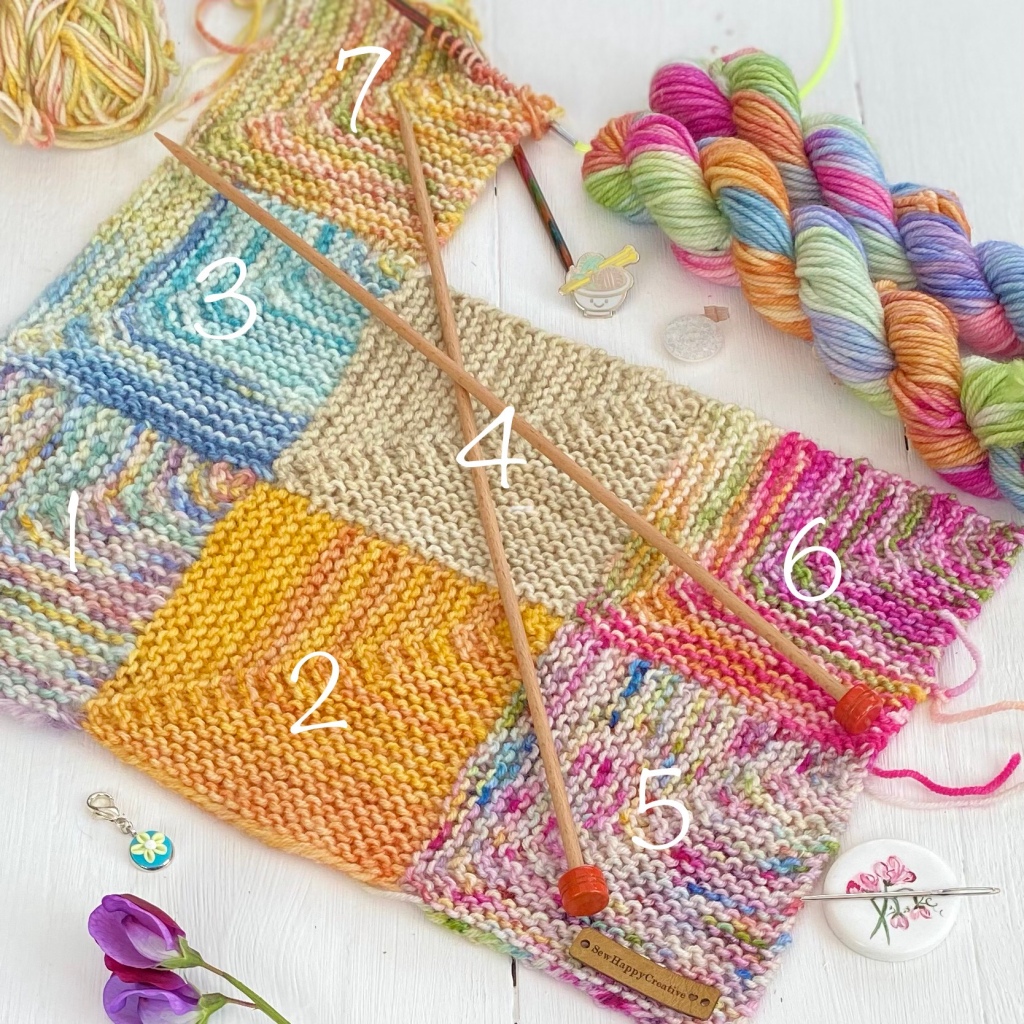
This is a “map” of the order I joined my squares in, so 8 after 7 but that will be next to 4 and 9 after 8 and next to square 6 .
All my squares were made by casting on 40 sts on 4mm needles . All rows are worked as knit rows creating garter stitch. Decreases are worked in the centre 4 stitches on alternating rows by knit 2tog twice. I used lots of my hand dyed mini skeins, sometimes using more than 2 shades for a square to use up all my bits and bobs of yarn ends . 1 20 gram mini skein of my hand dyed yarn will make 2 squares . 1 10gram micro skein will make 1 complete mitre square .
Cast on 40, knit the first row, placing a stitch marker half way through this row moving it to as you go .Row 2 Knit 18, ( this is 2 stitches before your stitch marker ) knit 2tog twice, knit 18. Row 3 Knit 38sts.
Row 4 repeat row 2 but this time Knit 17, knit 2tog twice, knit 17. Row 5 knit.( 36sts) Repeat rows 4 & 5 decreasing in the same way until you have 2 stitches remains, knit 1 more row, either knit 2 tog cast off or place in a stitch holder to knit 2 tog when you join in your next square.
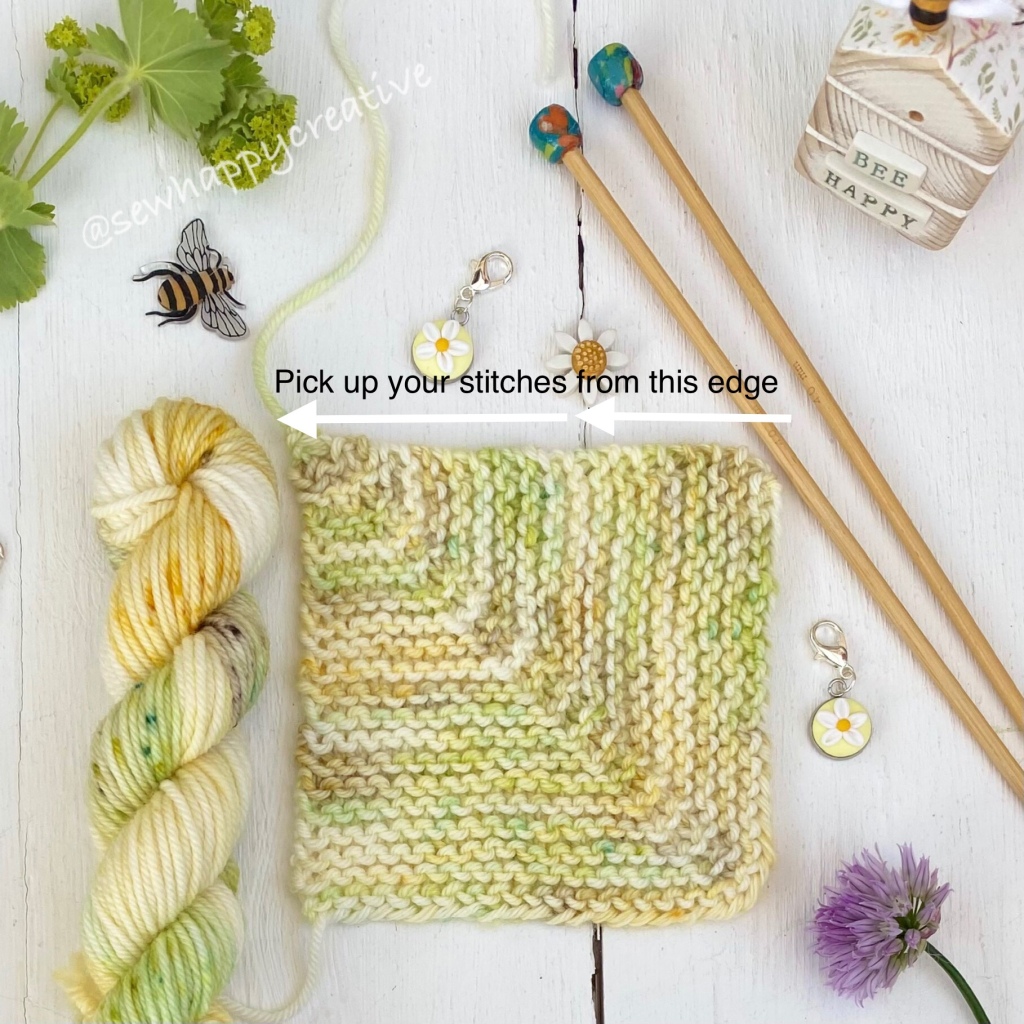
See photo below – To join in and knit your 2nd square, cast on 20 stitches and. Pick up and knit 20 stitches between row ends across top of square 1 as my photo below- 40sts knit 1 row and complete as your first square ,
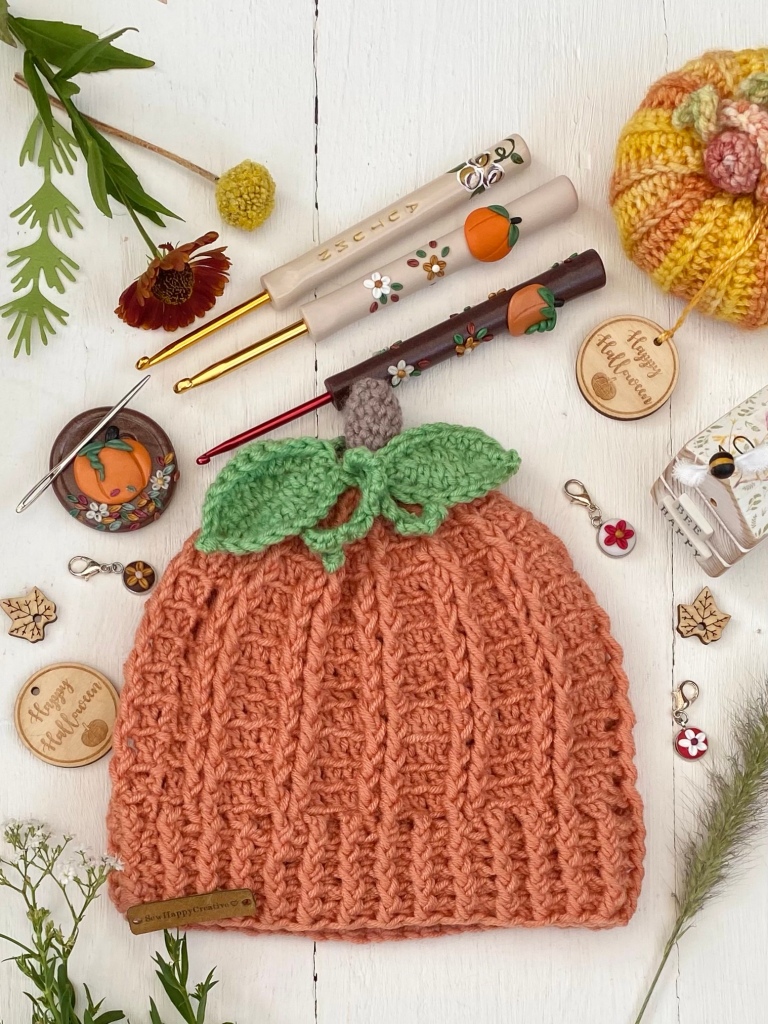
Pumpkin Baby hat 0-6 months, easily adapted for a larger baby sizes
Use any DK yarn and a 4mm hook. The hat uses treble stitches, and front post treble for the main part then front post and back post treble for the rib. It is worked in the round from the top of the downwards . All rounds are joined with a slip stitch.My original pattern uses bl tr as well but for this pattern I have simplified slightly using tr and fptr and bptr. If you wish to make your hat larger follow the pattern of my increase rounds. To lengthen your hat complete as many rounds of round 6 prior to adding your rib rounds .
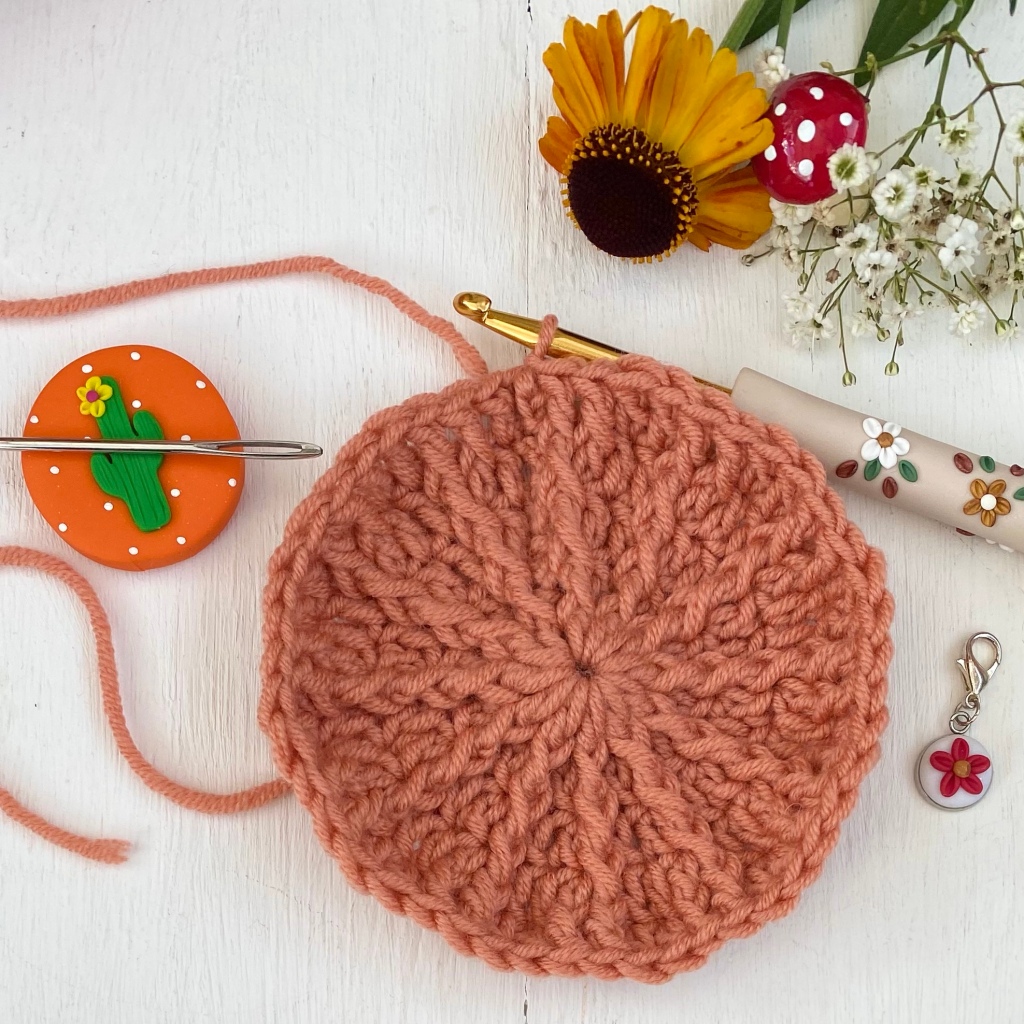
Rounds 1- 5
Foundation Round Using some pumpkin coloured yarn, make a magic loop or ch5, ss to join into a ring. Round 1 Into the magic loop or ring ch3 (counts as tr), 11tr into the ring, ss to join to beg ch-3, (12tr)
Round 2 ch3 (counts as tr), 1 fptr in stitch directly below your ch3 , this is the ch-3 of round 1, *1 tr in top of next stitch 1fptr in same stitch, * repeat from *to * ss to join to beg ch-3, (24 stitches ).
Round 3ch3 (counts as tr), (1tr, 1 fptr), in next st, *1tr in next st, (1tr, 1 fptr), in next stitch, * repeat from *to * ss to join to beg ch-3, (36 stitches )
Round 4 ch3 (counts as tr), 1tr, *(1tr, 1 fptr),in next stitch, *1tr in each of next 2 stitches, (1tr, 1 fptr), * in next stitch, repeat from *to * ss to join to beg ch-3, (48′ stitches ) for size 0- 9 months this is all the increase rounds completed . See last paragraph of pattern “ size notes “if you want to size your hat larger.
Round 5 ch3 (counts as tr), 1tr, 1 fptr in each of next 2 st’s, *1tr in each of next 2 stitches, 1 fptr in each of next 2 st’s* repeat from *to *, ss to join to beg ch-3, (48′ stitches )
Round 6 ch3 (counts as tr), *1tr each of next 2 sts 1 fptr in each of next 2 st’s* repeat from * to *, ss to join to beg ch-3 ( 48sts) repeat round 6 until you reach desired length . Repeat Round 6, I work 8- 9rounds straight after the last increase round.
When you have the desired length for your hat start the ‘rib’ round Rib Round Ch3, fptr, around first st , *bptr around next st, fptr, * around next st, repeat from *to *around, ss to join into beg ch-3. beg ch-3 is included in your stitch count for each rib round. 48 sts Repeat this round as many times as you like, I worked 5 rounds .
Size Notes on making a larger size. If you wish to make your hat larger eg 9 months -2 years or larger, follow the pattern of my increases rounds increasing your rounds by 12 stitches at a time. Here’s how, additional Increase round – ch3 (counts as tr), 2tr in next st, 1 fptr in each of next 2 st’s, *1tr in next st, 2tr in next st, 1 fptr in each of next 2 st’s* repeat from *to *, ss to join to beg ch-3, (60st ) Please note that when you continue with your hat on round 5 instead of having 2 trebles stitches between your front post treble stitches you will have 3 treble stitches.
Abbreviations beg =beginning, K = knit, sts, = stitches,
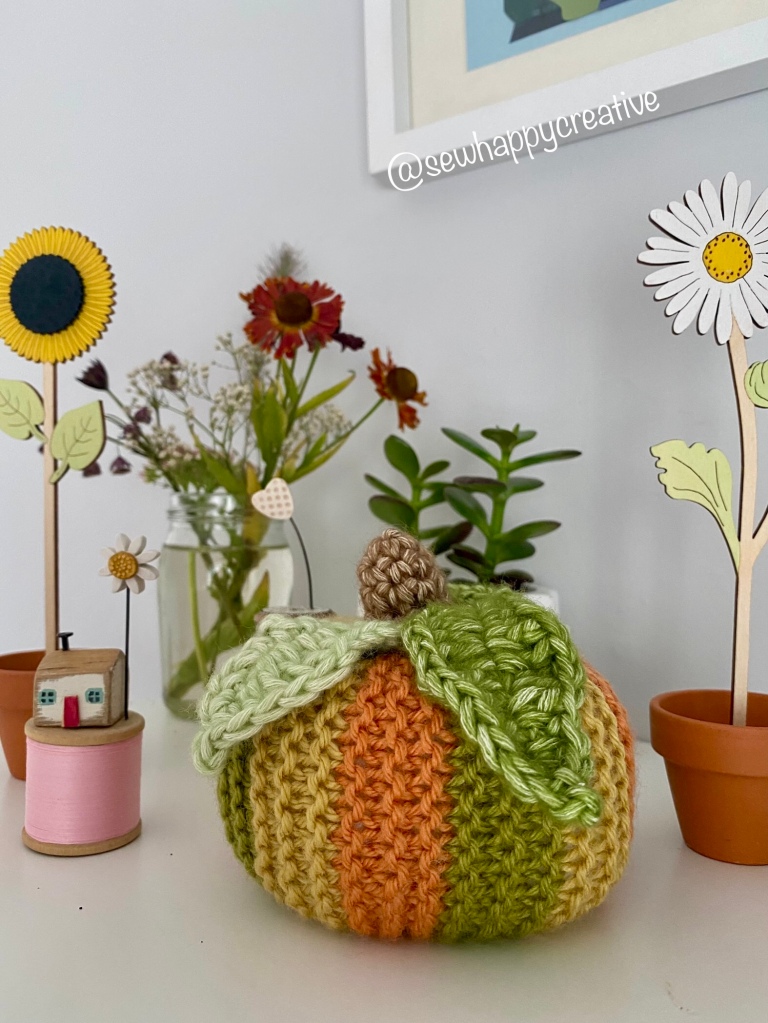
You will need. 5mm knitting needles, 3 different shades of aran yarn for your stripes. Contrast yarn for your leaves and stalk. Polyester toy stuffing and a needle for sewing up.
This is a really simple quick to make knitted pumpkin. I used Debbie Bliss Cashmerino aran which I happen to have in my stash . I used 5mm needles .The stalk and leaves are crocheted using my Free crochet pumpkin pattern also on my blog page follow my link for the pattern and leaves https://sewhappycreativeuk.wordpress.com/2019/10/07/pumpkin-pattern Made using simple garter stitch stripes . Easy to work to any size by adding more or less stitches and more or less rows. Work in dk for a baby size pumpkin 🎃 use 4mm needles for dk yarn. Measurements of my pumpkin are 13” (33cm) diameter, approx 4” (10cm) high with stalk.Have fun .
Beg, Using 5mm needles, Cast on 18 sts
Row 1- 6 Knit, – Knit using first contrast shade, Repeat Rows 1-6 for each of your 2 other contrast shades, working every row knit for garter stitch throughout. I used 3 shades and knitted each stripe with 6 rows of garter stitch.
I worked a total of 36 rows = 12 stripes and used 3 different shades, Cast off and seam together neatly along the cast off and cast on edges, sew in your yarn ends from your stripes . Gather along the top edge with some running stitches, pull up tightly, work a few stitches to secure but do not cut the thread. Stuff your pumpkin 🎃 from the base with some polyester toy stuffing, gather up the base edge like you did the top, work a few stitches to secure and fasten off. With the length of thread you left on the top of your pumpkin, thread a needle and pass the thread right through your pumpkin, from top to the base, pull up slightly enough to shape your pumpkin and fasten off at the base, add a wooden button to the base this helps your pumpkin sit level. Add leaves and a stalk from my crochet blog pattern . happy knitting , I hope you enjoy this quick easy to make pattern.
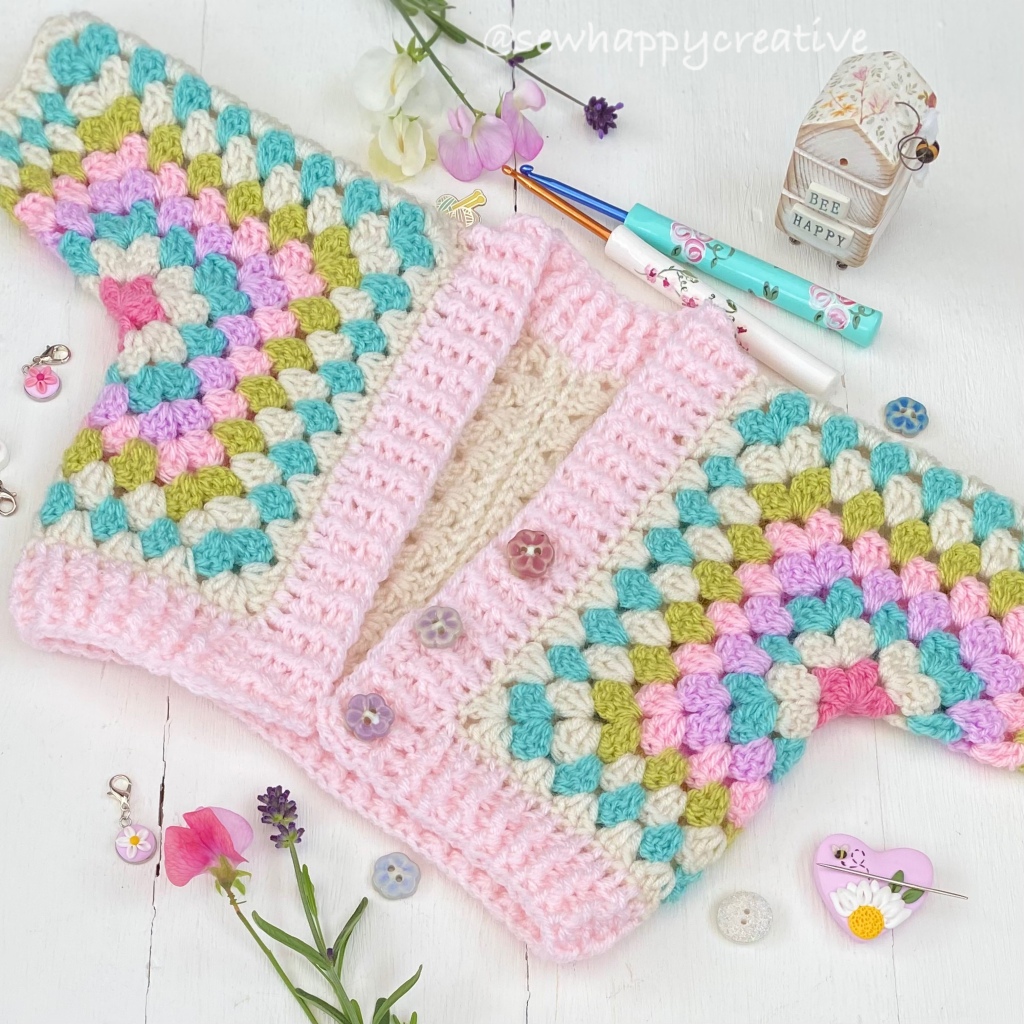
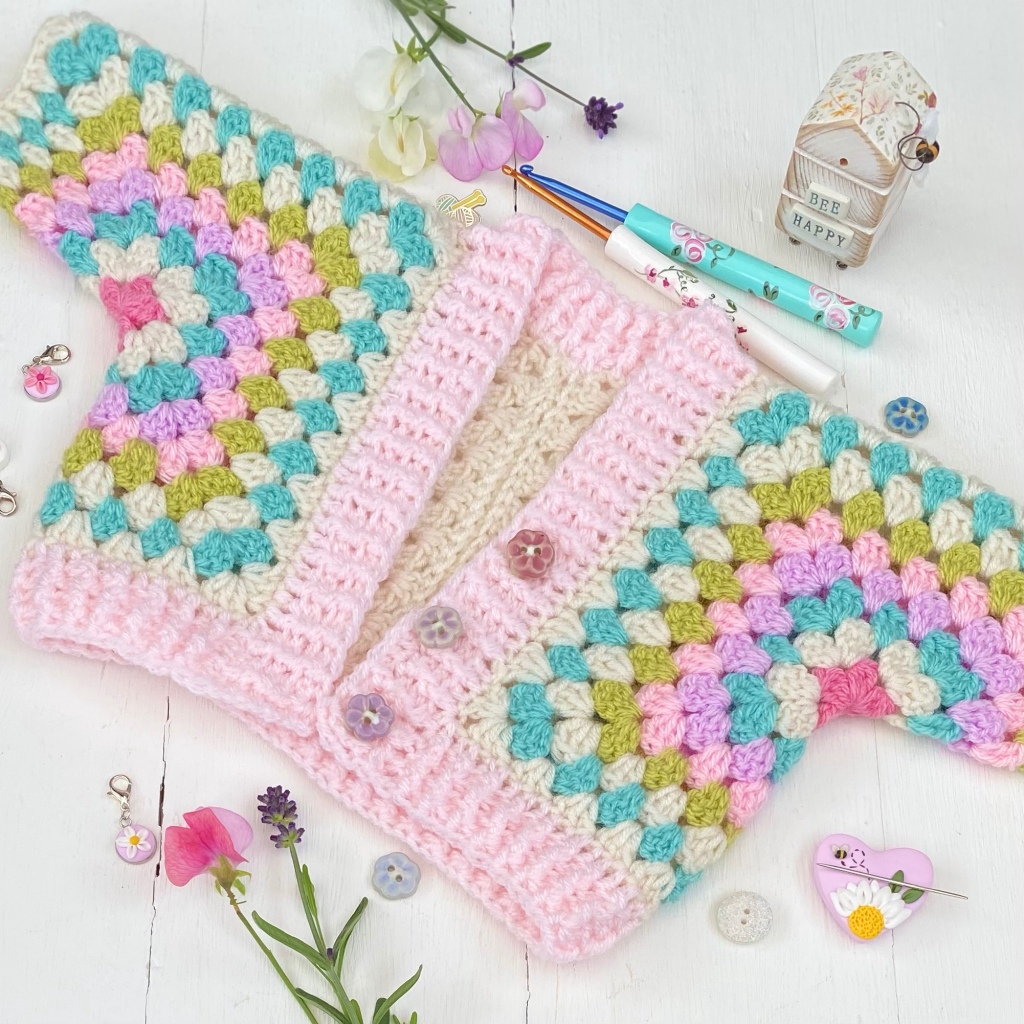
My beautiful granddaughter Maisy was born in June and I made her this gorgeous hexie cardigan to keep her cosy. It’s really easy to make and you can add as much detail as you like to yours and tailor it to fit .
As you can use any weight yarn I have not added a key, hook size or yarn because whatever yarn you choose select the appropriate hook size for that yarn. I have used double knitting for my hexie cardigan with a 4mm hook for the hexagons and for the rib trim 3.5mm. I’m a UK designer so all my patterns are written in UK terms throughout. The stitches used are treble =tr , half treble = htr, front post half treble, = fphtr, back post half treble = bphtr. If you are purchasing a pattern from my Etsy shop then I give tutorials for fphtr stitch & bphtr stitch eg in my granny square mitten pattern.https://www.etsy.com/uk/SewHappyCreative/listing/591268953/granny-square-crochet-patternwrist?
Pattern notes : Size your cardigan A hexie cardigan no matter what size you make is constructed from 2 hexagons. The 2 hexagons are simply folded in half and one side is stitched together to create the sleeve seam and both hexagons joined together to create the back seam . For my first cardigan which would fit a newborn baby. I used a hexagon with 8 rounds . For my second cardigan I used 9 round hexagon this would fit a baby from 0-3 onwards. For a larger cardigan add more rounds to your hexagon, eg if you were making a medium adult size cardigan you would need a hexagon with approx 20 rounds or a folded size of half a hexagon of a approx 21- 22cm . It’s easy to adjust your rounds . You then need to add straight rows to the one side of each of your hexagons to make them wider at the back and create a neck for your cardigan .See my photo below of Maisy’s cardigan . You also need to adjust your cardigan for body length and sleeve length . For Maisy’s cardigan I did this my adding a rib to the sleeves and around the body . For an adult cardigan you could make your sleeve longer by adding treble cluster rounds before the rib. You could also lengthen your cardigan in exactly the same way. The cardigan I’d describe as more of a jacket because although you can create button holes by the nature of the design means that the front of the cardigans just meet each other .
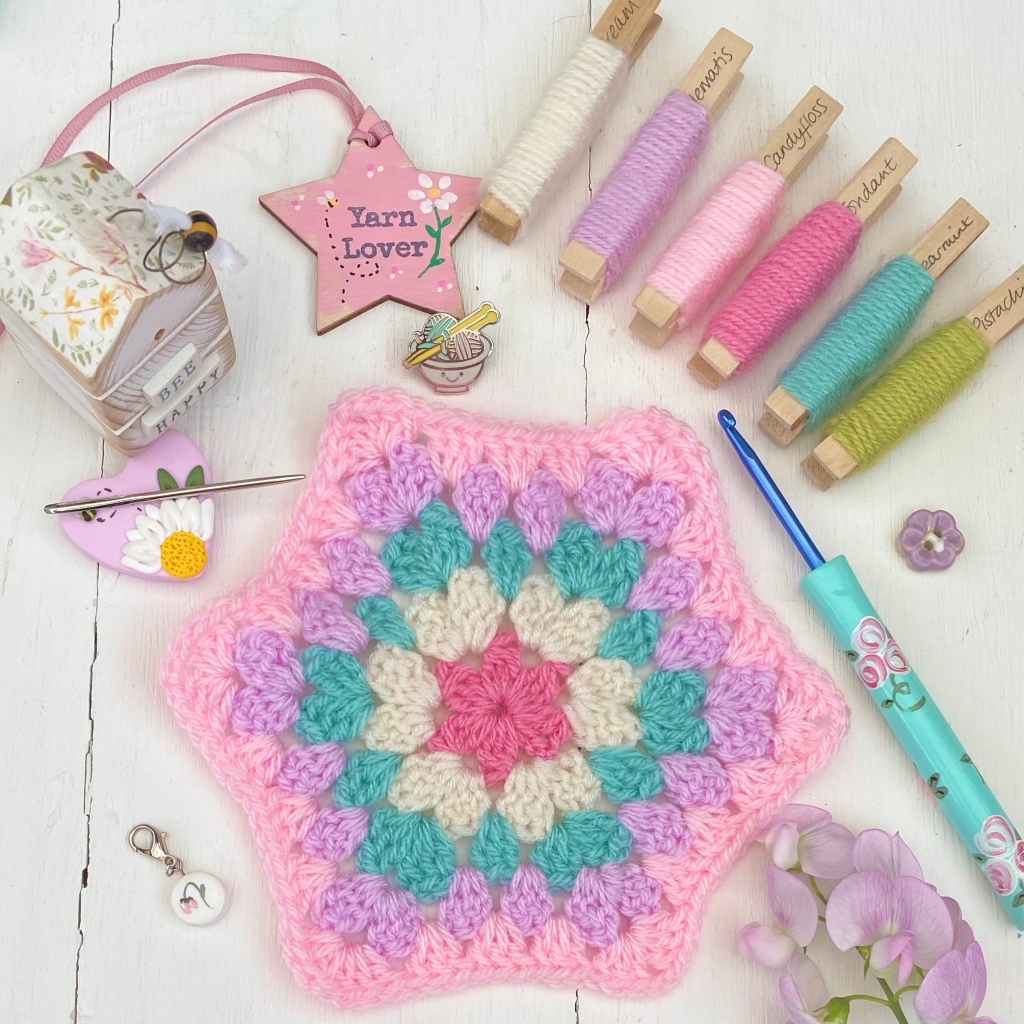
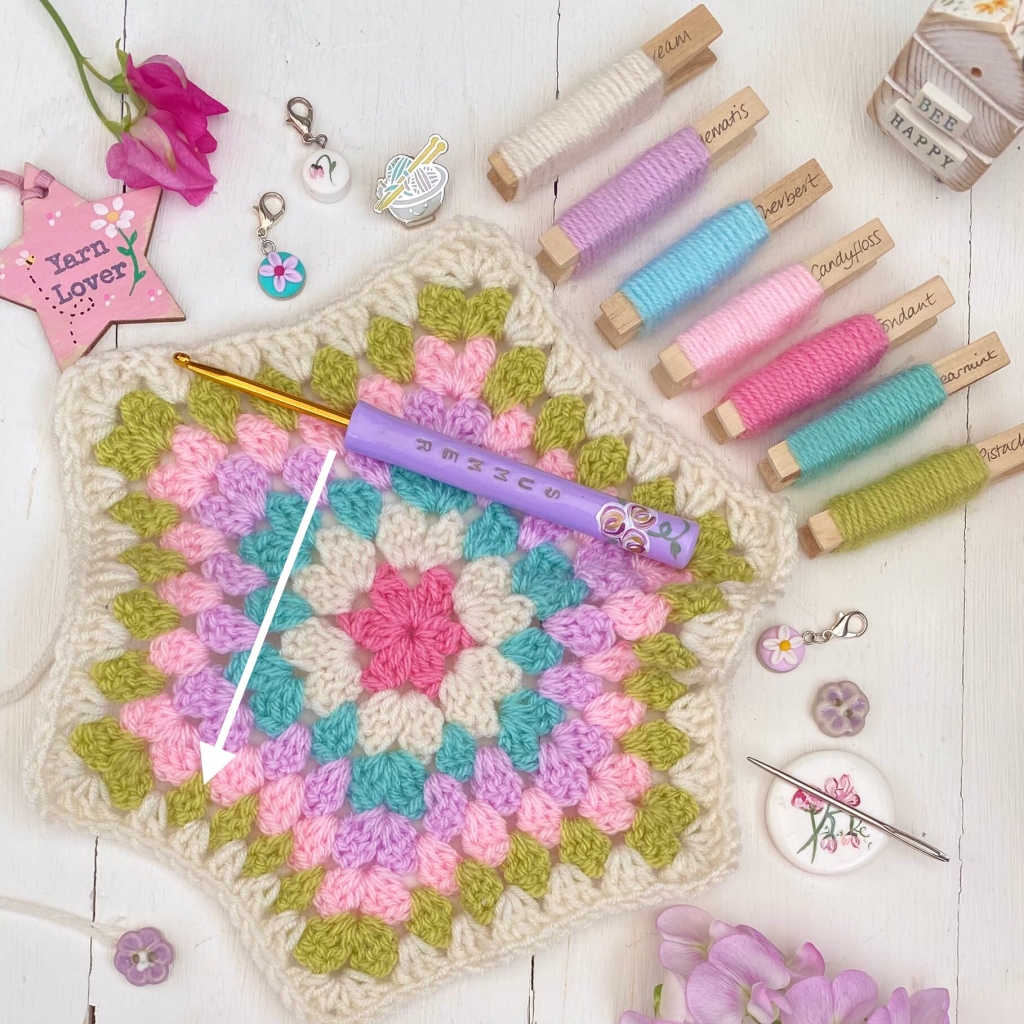
Round 1 into a magic loop, ch 3 (counts as tr), 2trcl in same sp, ch2, (3trcl, ch2,),repeat all in brackets 5 times, ss to join into beg ch- 3, fasten off (6trcl groups, 6x ch-2,) I found using a cluster stitch created a really lovely near finish to my underarm seam and a pretty flower .
Round 2 I like to flip my hexagon over after each round , Flip hexagon, attach a new colour in any ch-2 corner space of round 1, ch3 (counts as tr), 2tr, ch2, 3tr, in same ch-2sp, (3tr, c2, 3tr,) in each ch-2sp around, ss to join to beg ch-3, fasten off
Repeat round 4 as many times as you like to create your hexagon size required.
Round 3 Flip Hexagon over if desired, attach a new colour in any ch-2 corner space of round 2, ch3 (counts as tr), 2tr, ch2, 3tr, in same ch-2sp, 3tr, in next sp, *(3tr, ch2, 3tr,) in ch-2 corner sp, 3tr, in next sp* repeat from * to * around to complete your round, ss to join to beg ch-3, fasten off.
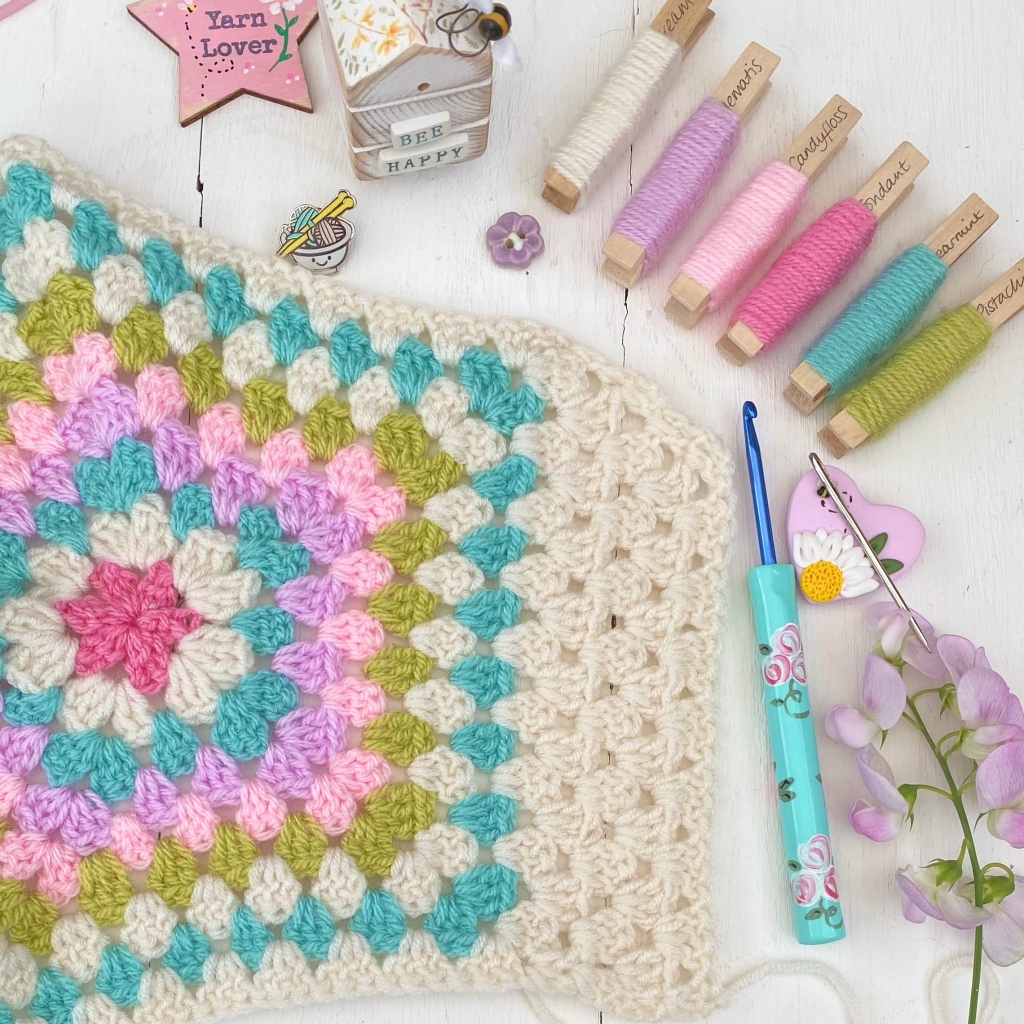
Round 4 and subsequent rounds. Work your 6 corners (Ch3, ch2, 3tr) and in the spaces between your corners 3tr. As you build your rounds your hexagon will “ripple “ it won’t lie flat, this is exactly what you want it to do.
Tip For Maisy’s cardigan I shaped the sleeves to taper them . I worked my hexagon exactly as above but on one side I worked 2tr instead of 3tr along one side of my hexagon only. The corners are still worked (Ch3, ch2, 3tr) exactly as all the corners. As Maisy’s cardigan is so tiny I did this on every round but if you wanted to shape sleeves on a larger cardigan I’d recommend doing this on alternate rounds only along one side.
This is the side of my hexagon for the sleeve cuff where I have worked 2tr instead of 3tr between the spaces .
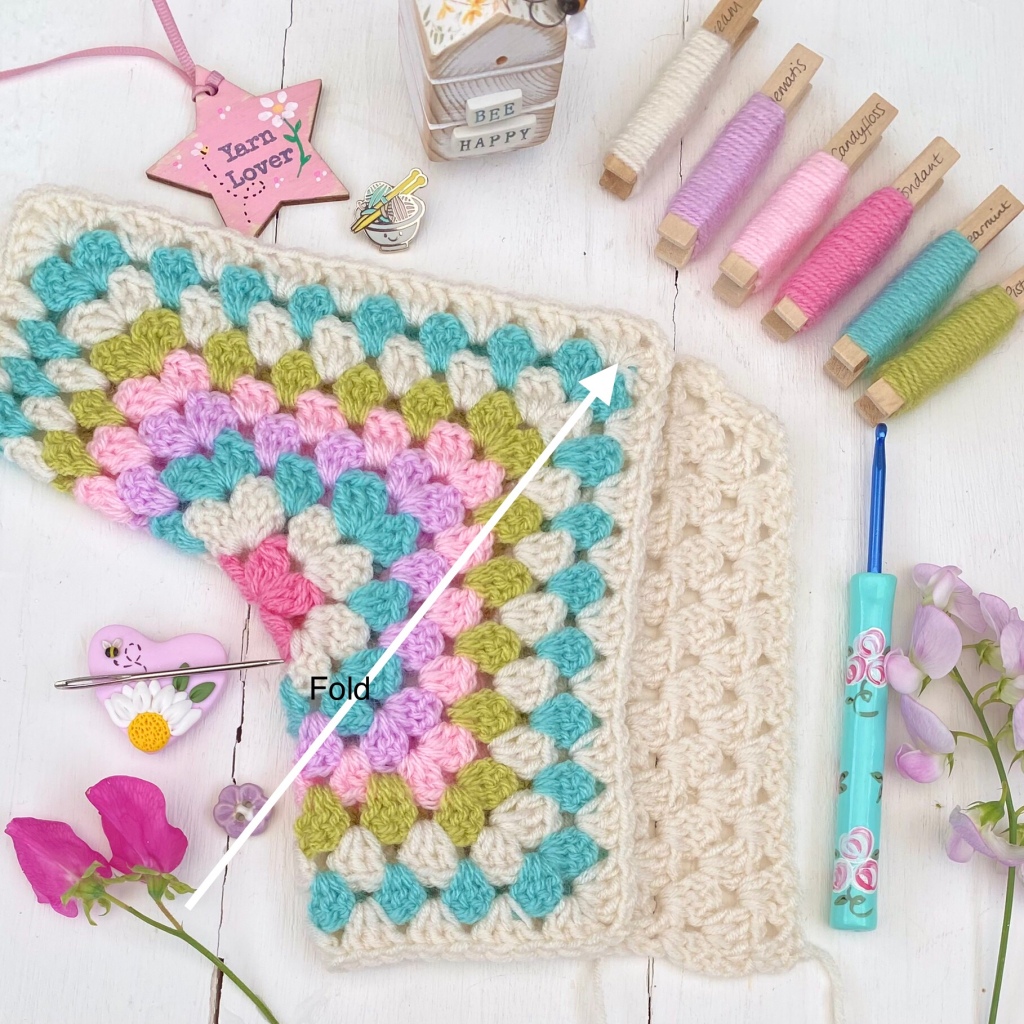
Next step When you have created a hexagons to the size you need. fasten them off or if you are continuing in the same colour like me you could leave your yarn attached. You will need to lengthen the back as I mentioned in my pattern notes . To do this work straight rows of 3 trebles in your spaces and 1 or 2 trebles stitches either end of your rows, for as many rows to create half the neck and back width to your cardigan , the other half of your hexagon will create the rest of the neck and back width for your cardigan . Work both hexagons the same . As you can see from my photo I have used 4 rows across each hexagon . Tip You may also notice that my rows are slightly shorter on my neck edge this is a fabulous way to shape your cardigan neck . If you zoom into my photo you will see a close up of my stitches. The bottom edge is completely straight the neck edge has short rows. Complete both sides the same way and seam together along the completed back straight rows .
Next step Fold both your hexagons as my photo below . If you tapered your sleeve, make sure this part is in position for your cuff and be sure to create an opposite version for the other side of your cardigan. With right sides together seam the top of your sleeve . Turn the right way out.
Note when you fold your cardigan the back seam should be joined although you can join this after you stitch your sleeve seam, whatever is easier for you ,
Lengthen your cardigan with a half treble front post & back post rib
Rib Section To make the rib on Maisy’s baby cardigan start along the bottom edge by working an even number of half treble, working a htr in every treble and htr in every end stitch . Work the number of rows you like in front post htr and back post htr in alternate stitches . Work htr around the fronts and neck edge starting at the edge of the rib you worked around the base of your cardigan and finishing on the opposite side , work rows of “rib” stitch as before until you have the length of rib you like. Sleeves, working in rounds and beginning with a round of even number half treble work around each sleeve and work rib rows as before . fphtr = front post half treble – bphtr= back post half treble Rib row starts with an even number of stitches , Ch2 (counts as htr ) fphtr, *bphtr, fphtr* repeat along your row, turn . Repeat this row as many times as you like. Start your rows with ch3 and finish with front post half treble.
Larger size cardigan if you work larger size cardigans you can make exactly as Maisy’s or alternatively add rows of treble crochet clusters please see my pattern notes above on sizing .
Please note that my patterns in my Etsy shop are far more detailed and have full photo tutorials. This pattern is written in my spare time and are not as detailed as I fit them in around my yarn dyeing and pattern writing .https://www.etsy.com/shop/SewHappyCreative Unfortunately I’m not able to offer additional pattern support on my free patterns but I will be bringing out a PDF version in my Etsy shop with more detail and any pattern support if needed.